Tuesday, April 27, 2010

I like big Bundts and I cannot lie.........


I like to think I'm an unconventional kind of gal. After all, I work as a painter for a living. I cut my own hair over the bathroom sink. I used to wear safety pins as earrings (yeah, it was an ill-advised phase in high school; I thought they looked wicked rad), and I've been known to make jewelry out of paper and feathers as well. I am what I think you'd call a 'fearless eater,' and there is almost no recipe on Earth that I won't at least try (unless it comes from the kitchen of Paula Deen, that woman terrifies me). But I must be more conventional than I realized, because as it turns out, I love to make Bundt cakes. Like, love it. There's something so satisfyingly structural about them, so finished from the moment they pop out of the pan. They're almost architectural, like desserts handsculpted by Buckminster Fuller (Google him, non-architecture nerds). And nine times out of ten, they need no more dressing to their curvaceous rounds and grooves than a simple dusting of powdered sugar, or the lightest back-and-forth drizzle of glaze. Oh yes. I like big Bundts (and ridiculously obvious blog post titles) indeed! So call me conventional.

Being the conventional, good wife-type that I am, as well as the recent recipient of a brand-new shiny Bundt pan (hooray for wedding showers!), I graciously and magnanimously allowed Mike to choose the flavor of our next Bundt. After all, I've put the man through so many of my kitchen phases in which I've been borderline-obsessed with learning to make my own bread or pasta or hot sauce or dumplings and nothing else, or the few months in which all I wanted to eat was hazelnut brown butter cake. Not wanting to be a kitchen dictator, I handed over the reins, and after a few minutes on Tastespotting (it's dangerous to linger there any longer) the verdict was in: Tiramisu Bundt Cake.
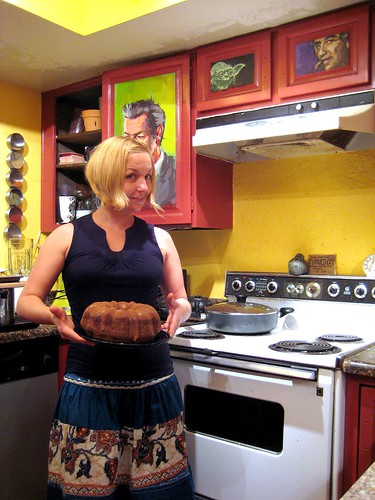

And look how pretty it is! David Bowie, Yoda and Peter Falk certainly seem to think so, anyway (there's a tantalizing peek into our weird, colorful little kitchen world for you). All golden brown, shapely perfection. Let's admire it for a moment, shall we?
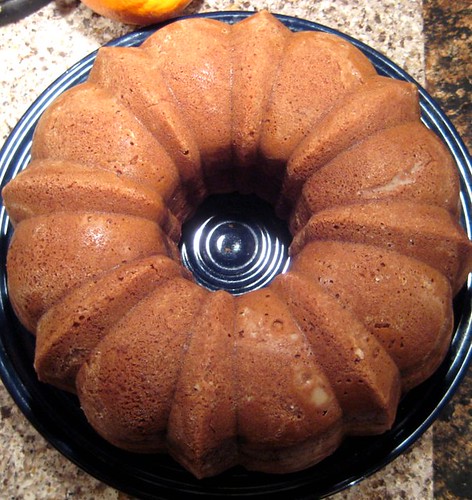


Yes, yes, it's very pretty. But do you remember what I said before, the thing about nine out of ten Bundts requiring no further gussying-up than the lightest touch of powdered sugar or glaze? Well forget that, because this is the exception and I am about to cover this mother in a generous amount of boozy sweet mascarpone cheese--it is 'tiramisu' cake, after all! Farewell, glorious curves! It's for the greater good.
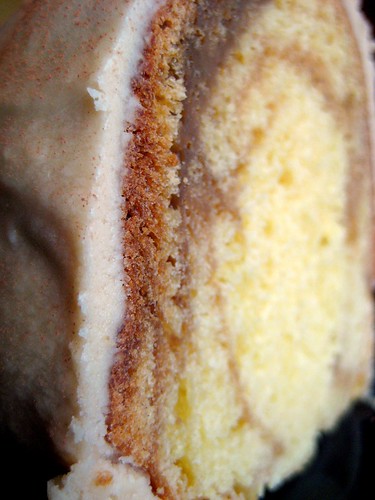


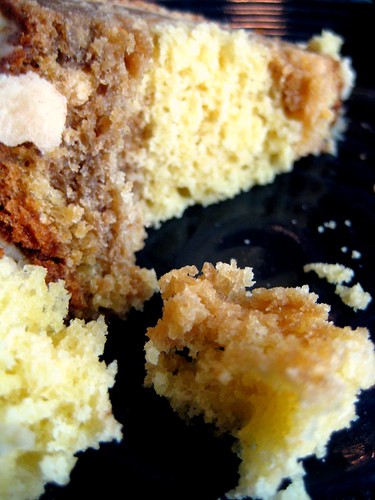
A slice of the finished product, in luscious detail.
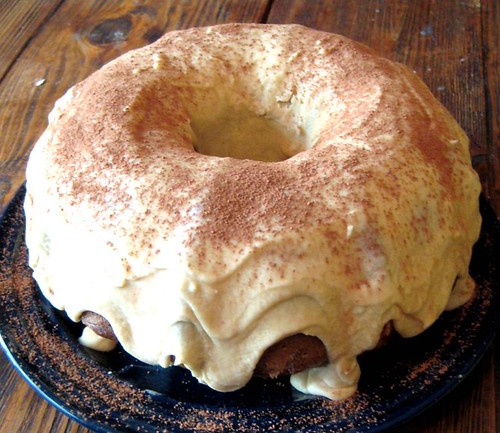


It really looks more like an overgrown donut at this point than either a classic Bundt or a tiramisu, but hey. When there's this much creamy cheese, strong coffee and sweet sweet liqueur involved, how much do looks really matter?

Here's the verdict on the recipe: it's good. I love this particular combination of flavors, and I especially love the trick of separating this into three batches of batter (an espresso, a Kahlua, and a plain vanilla batter) and then marbling them together in the pan. It's pretty, and more reminiscent of a layered tiramisu than a cake that combined them into one homogenized mass would be. What I didn't love was the texture; even though I was warned by the original blog entry that this cake was a dense one, more like pound cake than classic vanilla sponge, I still wasn't quite prepared. We loved the taste but were hard pressed to eat more than a tiny slice each (although I have to admit to eating a slice right out of my hand the next morning with my coffee). Maybe I just prefer my desserts a little lighter in texture? Then again, a lighter cake might not be able to stand up to such a rich, heavy icing. More delicious research is obviously necessary!


Tiramisu Bundt Cake (adapted from original post here at Baking Bites)

3 cups all purpose flour
2 tsp baking soda
1 tsp baking powder
2 tsp salt
3/4 cup butter, room temperature
1 1/2 cups sugar
3 large eggs
2 tsp vanilla extract
1 1/2 cups milk
1/4 cup espresso (if you are fancy......lacking a home espresso maker, I substituted the same amount of my usual, superstrong, morning French press brew)
1/4 cup Kahlua

Preheat oven to 325F. Grease and lightly flour your Bundt pan. In a mixing bowl, whisk together flour, baking soda, baking power and salt. In a large bowl, cream together butter and sugar until light. Beat in eggs one at a time, followed by vanilla extract. Add flour mixture and milk to the egg mixture, a little at a time and alternating between each, mixing just until everything is incorporated.

Remove 1 cup of the batter into a small bowl. Remove another cup of batter into a second small bowl. Add espresso to one of the small bowls and whisk until well-combined. Add Kahlua to the second small bowl and whisk until well combined. Pour half of the plain batter into the Bundt pan and spread into an even layer. Pour the Kahlua batter into an even layer on top of the plain batter. Pour espresso batter on top of Kahlua batter. The flavored batters will be slightly thinner, and may spread into one another, but this will create a pretty 'marble cake' effect. Resist the temptation to mix or stir them. Carefully pour all remaining plain vanilla batter into the Bundt pan.

Bake 55-60 minutes, or until a toothpick inserted into the center comes out clean.

Let cake cool in pan for 15-20 minutes, then turn cake out onto a wire rack to cool completely before frosting.

Kahlua Mascarpone Frosting

1/4 cup butter, room temperature
4-oz mascarpone cheese, room temperature
1/4 cup Kahlua
2 cups confectioners sugar

Combine all ingredients in a mixing bowl and beat at medium-high speed until very smooth and fluffy. Use a butter knife or offset spatula to apply the frosting to the cake in a thick, even layer. This frosting is pretty boozy, hopefully that's your cup of tea. It didn't stop me from eating a slice for breakfast the next morning, as I mentioned, but you might not want to take all your cues from me. I'm unconventional. ;)

Sunday, April 25, 2010

Bizarre Foods: Home Edition*!!


( *aka, interesting finds from our local supermarket, Part One of many......)

So, I had lunch the other day with a few friends, one of whom I haven't seen since our wedding last November. This friend looked me straight in the eye in the manner of one about to begin a heart-to-heart and said, 'SO. I want you to tell me..........what was the weirdest thing you ate on your honeymoon??' Whew. That one I can handle. ;)

She was referring, dear readers, to our 2-week honeymoon in Hong Kong, one of the world capitols of eating as far as I (and 7 million Cantonese) am concerned, but certainly also home to many edibles that would fall under the categories 'weird' or 'bizarre.' I racked my brain--I mean, it's not like we ate snake (that was the rehearsal dinner, true story!). 'Um, I ate......a lot of questionable things in steamed buns? And I ate my first whole crab, but that was delicious? I discovered how much I like fried baby octopus on a stick....and I ate whole duck's foot stuffed with fermented soybean paste?' The last one had her turning a delicate shade of green, and I knew we had a winner. For the record, I really do love fried baby octopus on a stick, and I think it's a damn shame that it isn't regular street/fair food around these parts--I could sure go for one right now. But the entire episode got me thinking, just what constitutes 'bizarre,' anyway? One man's bean curd-stuffed whole duck's foot is another man's deep-fried Twinkie, after all. So, as Mike and I kind of fancy ourselves amateur Andrew Zimmerns (he of 'Bizarre Foods' fame on the Travel Channel), but are sadly lacking in the travel budget these days, we have decided to take our vacations in our imaginations and at our local supermarkets for the time being. At least until my book deal comes through. ;)


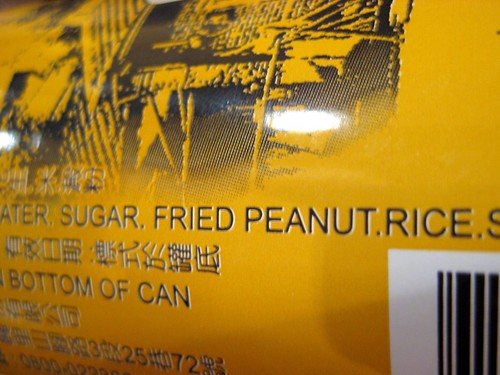
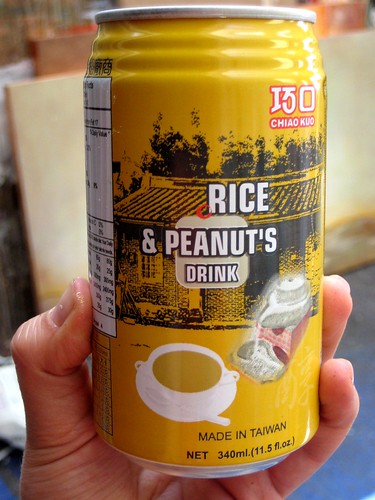
Up first: two contenders in the 'beverage' category from our local LeeLee Asian Market. The first of these was completely new to me, a Taiwanese canned thing labeled 'Rice and Peanut's [sic] Drink,' and........ohhh boy. Rice and peanuts it certainly tasted like. Rice and peanuts (and sugar) it certainly consisted of. See??


It was a weird beverage from start to finish. The thick texture wasn't unfamiliar or even unpleasant, it was slightly reminiscent of a Thai iced tea. But the vegetal, boiled peanut taste was a little strange, and the slight grittiness from the rice content was a little weird to contend with as well. Basically, it lacked the two things I love about a classic Thai iced tea: the intense, condensed milk sweetness and fragrant tea flavor....all this while possessing all the questionably drinkable (even gaggable?) qualities of a drink this thick and milky. It was a little difficult. As I called out to Mike, 'It's not bad! I just.........don't think I'm going to drink any more of it.' And sure enough the other half of the can languished in the fridge for a week.

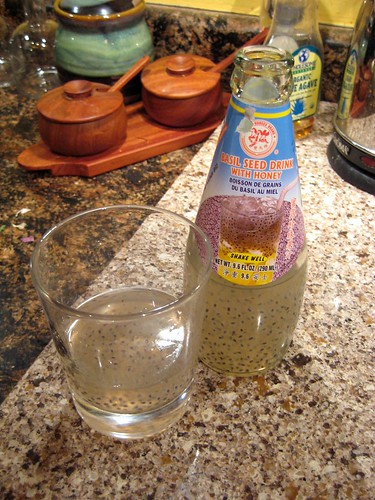
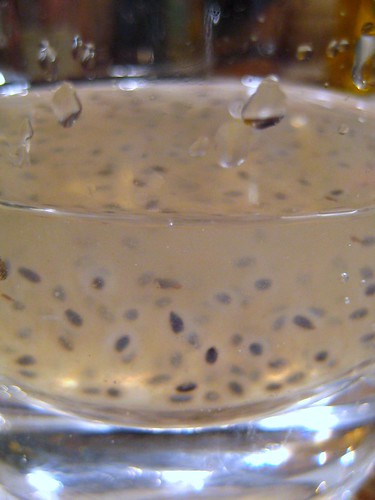
Our second contender was a proven Laurel favorite from the past (and thus kind of a cheat, but when you've put yourself through canned-rice-and-boiled-peanut drink, what's a little cheating, after all??) known as 'Basil Seed Drink.' Brace yourselves, it looks horrifying. Are you ready?


See??
I told you. It looks like something from a petri dish in a fertility research laboratory, I know, but the taste and even the unusual texture should be no great shakes for anyone who is accustomed to & loves Asian style 'bubble tea.' Sure, the slimy, bubbly objects about to use your throat as a fleshy waterslide aren't tapioca 'pearls' but gelatinous basil seeds, but still. This honey-sweetened, popular Southeast Asian drink is honestly delicious, despite its resemblance to a tadpole-ridden water sample from the Black Lagoon. Ever so faintly licorice-y (even bubble-gum-y?) in the way of sweet basil leaves, the taste is mostly sweet and refreshing. The overall impression left my this drink is mostly that of the slimy, gelatin-coated seeds rushing past your lips with every sip, but if you can stand the sci-fi-like experience (or if you're into that sort of thing; apparently I am), it's quite a treat, really. Basil seed drink, who knew?? I think I love you.


More 'Bizarre Foods: Home Edition' posts to come soon! The Asian market alone should prove quite the wealthy source for material--after all, we still have frozen ant eggs to try, and durian fruit, and red bean paste ice cream, and dried squid snacks, and fresh pork uterus, and so many, many more treats! Coming soon!

Saturday, April 10, 2010

Insert 'Egg' Pun Here..............

Egg-citing? Egg-specially delicious? Egg-stra super special (and somewhat delayed) springtime egg-themed blog post? Oh, I just can't do it! No more egg puns from now on, I mean it.

This time of year, I find myself thinking a lot about eggs, and not just the chocolate coated, caramel centered kind, either. Maybe it's a deep primal urge that strikes at springtime, relating everything my metaphorical gaze falls upon to the cycle of new life and rebirth. Baby lambs, tender green buds, all things ovoid, that sort of thing. Or maybe it's just the ever-present shelves of those damned aforementioned chocolate eggs in the grocery stores. Regardless, it's been an EGGSTRAVAGANZA (ouch, sorry! that one just slipped out!) over here lately, and I want to share a few egg secrets with you. I had initially meant to time this egg-themed post to coincide with Easter Sunday last week, but real life and deadlines stepped in for awhile, and anyway readers......is there ever really a bad time to talk about eggs??


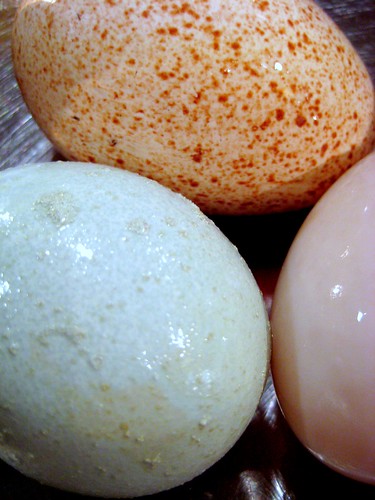
So, we at the Orange & Salt household discovered something a few weeks ago that I can only describe as culinary gold, which seems pretty fitting since they are, in fact, golden. At least on the inside. What we found is a desert plant nursery in South Phoenix that also houses a small farmer's market stand indoors, where they sell cartons of some of the most beautiful eggs I've ever tasted. After bringing home the first carton of chicken eggs (in a delicately hued rainbow of blues, greens and browns) and demolishing them in record time via some very serious breakfasts and quiches, we were ready to move on up to the deluxe dozen of duck and turkey eggs, if for no other reason than curiosity. Have you ever eaten a turkey egg before? Neither had we.


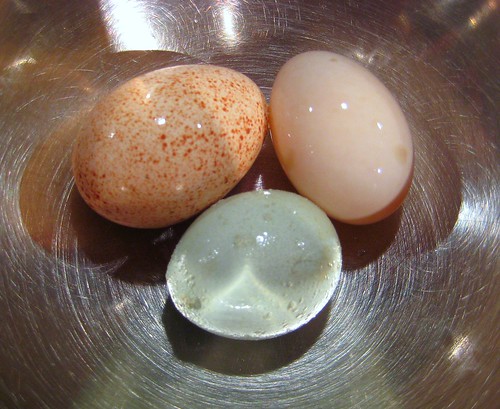
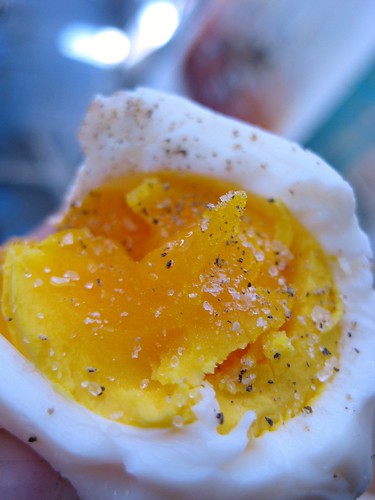
The duck eggs were not much larger than the chicken eggs we'd eaten previously (although they themselves were fairly large, so that's not saying much), just slightly more elongated. The turkey eggs, however, were jumbo-sized footballs by comparison! A little intimidating to say the least, but it's also hard to resist anything so adorably freckled, so we dove right into those first. I had to try my first turkey egg solo, simply hardboiled with just the lightest sprinkling of sea salt crystals and fresh black pepper standing between me and (at least, what I hoped would be) fine, fine turkey egg goodness.


It's true, they're delicious. Really. There's a subtle difference between them and the more conventional chicken eggs I've eaten, a flavor that I really, really hesitate to call 'barnyard-y' because that sounds so unpleasant, but I can't quite put my finger on a better term for it, either. Maybe they're just richer? At any rate, far from being unpleasant, I actually think these taste better than their smaller brethren in that they seem to be missing that faint whiff of sulfur that hardboiled chicken eggs always seem to come with (the downside of eating eggs, which most egg lovers just usually pretend doesn't exist), which in my mind is a huge improvement. And speaking of huge--these eggs are! The yolk also seems a little bigger than you'd expect, proportionally speaking, which is a nice surprise. And of course any variety of farm fresh egg is going to have richer, deeper golden (almost reddish orange!) yolks compared to the pale, flabby specimens sold at the supermarket. Real, pastured farm eggs contain at least twice (often several times more) the beta carotene, Omega-3s and vitamins A, D and E of conventionally 'farmed' eggs. One turkey egg (six minutes for lightly hardboiled) is a filling breakfast indeed.


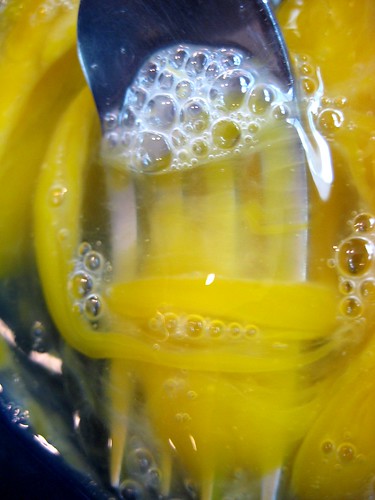
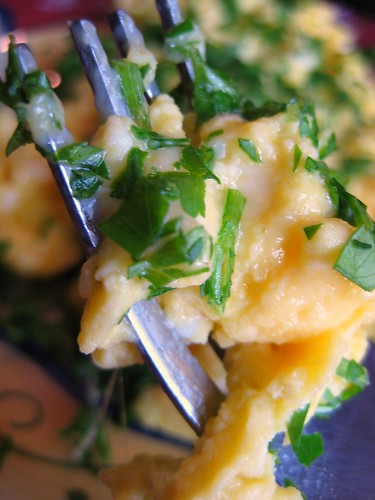
Once you get tired of eating straight-up boiled eggs (and I wouldn't blame you if it took awhile), you could move on to any number of things. The perfect plate of scrambled eggs, in my world, includes a handful of grated cheese and a sprinkling of fresh green parsley at the end. It's another simple way to enjoy the taste & most of all the shocking yellow color of these eggs. This is also the moment when I discovered that, in addition to being merely deeper in color than most egg yolks, turkey yolks are incredibly dense. When I first plunged in my fork to scramble these bad boys, it reacted almost like a ball of yellow caramel: dense, thick, sticky. It actually clung to my fork whenever I lifted it from the bowl! Amazing things, these turkey eggs.


A carton of eggs lying around in my fridge is always, always an invitation to make a quiche, so that's just what we did. This particular quiche actually combines 2 chicken eggs, 1 duck egg and 1 turkey egg with cheese, sauteed baby spinach, garlic and lightly caramelized onions.


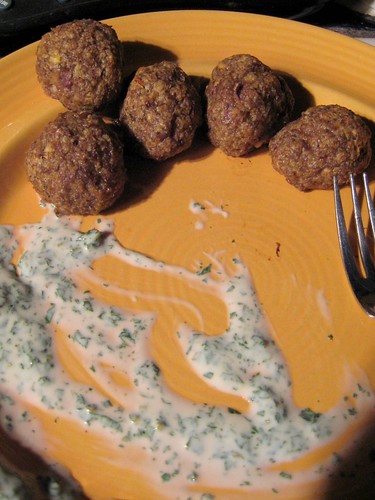
Finally, when you're down to your very last egg, you can treat yourself to the meal we had for our own Easter dinner, a tasty lamb meatball concoction with a fresh, cool yogurt dressing.....see recipe below (it's also easy to double or triple these amounts if you're feeding more than two people). Now get yourself to the farmer's market and pick up some fresh eggs!


Lamb 'Egg' Meatballs with Mint-Yogurt Sauce

For the meatballs:

1 lb. ground lamb
1 whole egg, lightly beaten
3/4 C. bread crumbs
1 tsp. ground cumin
pinch of cinnamon
salt & pepper

For the yogurt sauce:

1 C. plain yogurt (thick, Greek-style yogurt would be excellent here)
3 T. finely chopped fresh mint (we might have used more than this, since I have an explosion of mint in my backyard garden at the moment and always feel the need to use it......just do what looks and tastes right to you)
1 tsp. honey
salt

Preheat oven to 400 degrees. Combine all meatball ingredients in a bowl, mix very lightly by hand until the mixture is just combined. Beware over-mixing! It's a texture thing. I'm always tempted to pull out a wooden spoon or even the food processor at this point, but the result will be heavy, overly dense and homogenized little meatbombs, not juicy and tender lamb eggs, so beware. Trust me, your best utensils are often the ten digits at the ends of your hands, so wash up, take off your rings and get in there, okay?

Roll meat mixture into balls (makes about 12 meatballs) and, if you're cutesy like us, form gently into 'egg' shapes. Place on baking sheet. Bake for about 20 minutes, or until nicely browned.
While meatballs are baking, combine all yogurt ingredients in a small bowl (add salt to taste). Again, stir minimally, as too much stirring might cause your yogurt to get overly thin. Serve next to meatballs, dip and enjoy.

Saturday, March 20, 2010

'Smitten' with Warm Mushroom and Arugula Salad........

It should come as no surprise that, as a food blogger, I read other food blogs. Clotilde's Chocolate & Zucchini arouses a little Parisian frisson every time I read a new entry (and you have to love a good ampersand), David Lebovitz always inspires, I have read the entire famed 'Julie/Julia Project' blog from virtual cover to cover, and Deb's smitten kitchen and Molly's Orangette very often make me actually laugh out loud. Even the venerable Judith Jones (she of discovering-Julia-Child fame) blogs, for God's sake, and the woman is in her mid-80s! There's a wealth of food bloggery out there for the taking, the reading, and the (pardon the inexcusable food pun) digesting. And yet I read somewhere that most people don't actually use the wonderful recipes they come across online via food blogs; most people are in it largely for the breathless thrill of food porn alone. Whatever takes your fancy, I've been guilty of the same in the past......but when we're backed up against the wall over here with no dinner ideas in sight, and our imaginations fail us, we turn to three possible sources: The Library, The Files, or The Blogs.

The Library, as the name suggests, refers to Mike's and my collection of cookbooks. No tidy, Dewey decimal'ed shelf of books is this, but rather a sprawling, uneven clutch of books whose epicenter is the far corner of our small kitchen. Hardcovers, paperbacks, large and small books and pamphlets of all kinds squat together, punctuated by the occasional corner of a white sheet of paper protruding from a book, on which might be a handscrawled recipe for cornbread from Mike's dad, or printed out instructions from Alton Brown on how to construct the perfect holiday turkey from all the way brining to roasting. A pickling cookbook sits next to one specifically for soup, a book of traditional Austrian recipes nestles between Anthony Bourdain's Les Halles cookbook and Thomas Keller's French Laundry cookbook, and even Julia Child and Martha Stewart manage to bunk decently together without any elbowing or girlish hair-pulling.

The Files, as they are so vaguely referred to, represent years' worth of pulled recipes from magazines of all sorts that long ago met their fate in the recycling bin. These include such venerable publications as the New York Times Sunday magazine, Food & Wine and Bon Appetit, but also Every Day with Rachel Ray (what can I say? She's had some good recipes) and even the now-defunct JANE magazine (R.I.P.). When I see a recipe I'm likely to try (or even one I'd like to think I'll get around to, you know, someday), I pull it for The Files. Don't let the name fool you. Much like The Library, The Files are no glossy, organized affair, but an unbound, messy, sliding stack of loose magazine pages that have occupied various spots in the house and occasionally gets lost (as it did a few weeks ago when we misplaced the whole stack somehow and were desperately searching for a certain treasured jerk chicken recipe that was certain the be in The Files.....if only we could have found them! Alas.). The Files currently occupy one corner of a low ottoman in the dining room, next to some back issues of the Times and empty boxes we are saving one at a time for our move. At least, I think.


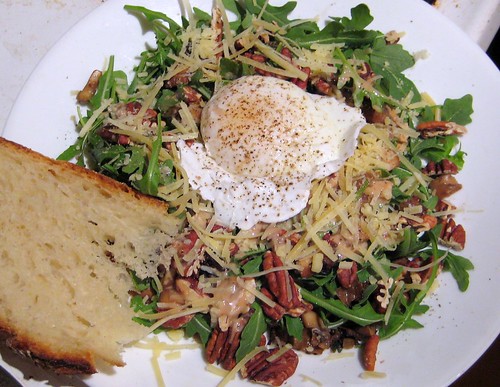
Finally, we also sometimes turn to The Blogs, a category which includes all the blogs I listed above plus many, many others. And it was in turning to The Blogs this past Monday that I found this gem via smitten kitchen: Warm Mushroom Salad with Hazelnuts (original recipe can be found here). My heart went pitter-pat. Warm mushrooms! Hazelnuts! Peppery greens and slivers of sharp pecorino! I had to have it, exactly as Deb suggested, with a slice of crusty bread alongside it and a warm poached egg snuggled on top. I even baked a loaf of bread specifically to have some on hand to go with this salad.


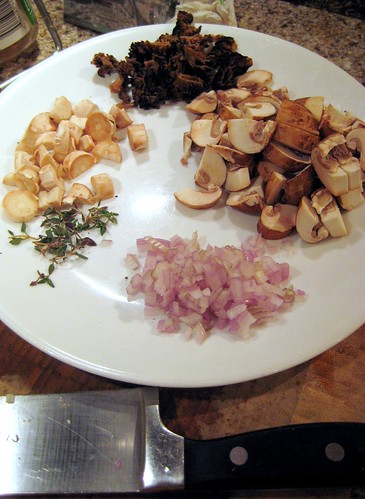
After making a few substitutions (okay, I hesitate to say 'compromises'), the tale of the warm mushroom salad had a happy ending.....it was delicious! I used grated parmesan as the cheese, formerly-dried morels and baby portobellos instead of an assortment of fresh wild mushrooms, and pecans stood in for expensive hazelnuts (oh, for the day we move to Oregon, where the streets are paved with hazelnuts and fresh morels!), it's true. But once the runny golden yolk of the poached egg was pierced and spread silkily throughout the warm innards of the salad, I was hooked on the nutty, rich, crunchy flavors. A little compromise worked out just fine in this case. With crusty bread in hand, I wiped the plate clean, readers.


Monday, March 15, 2010

Lest you think it's all Martha Stewart around here........

Glamorous moment in the life of a Food Blogger: Mike and I purchased a brand-new, schmancy mandoline from Williams-Sonoma to replace our old basic model yesterday. It's twice the size of the old one, deadly sharp, and best of all adjustable. Ahhhh. Slicey bliss.

Unglamorous moment in the life of a Food Blogger: Uhhh, I just uncovered a be-Tupperwared slice of cake at the back of our fridge. From our wedding shower. On October 4th.

Such is life. ;)

Chef Laurel's School of Asian Delights........

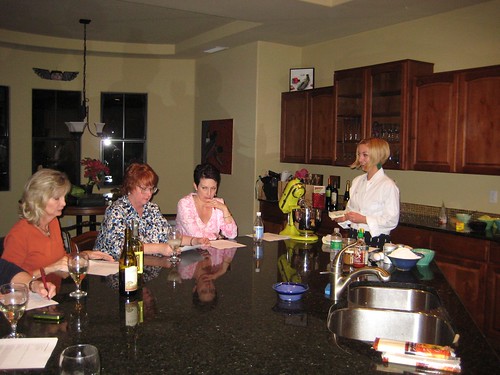
Being the independent, self-employed person* that I am, I'm used to wacky schedules, fluctuating workloads, and picking up the occasional odd job to make ends meet. It's a far more interesting lifestyle than the typical 9-to-5 grind I left behind, and I honestly wouldn't trade it for the world (if for no other reason than that I'm never going back to wearing pantyhose and heels again--never!). But I've never had quite such an interesting odd job offer as the one my mother laid in front of me a few weeks ago: teach a cooking class at her semi-regular 'Girls' Night' gathering. Would I accept? Of course I would! I think I may have actually done a little happy dance! Chef Laurel was ready to roll.

I love little finger foods, and I love Asian flavors. And what I really, especially love is teaching people to cook something new when they're at their happiest--glass of wine in hand, surrounded by lifelong friends in a warm glowing kitchen, not intimidated, totally relaxed and ready to have fun. This is the mindset I always try to achieve before I start my own cooking, and I've found there's nothing like being in a good mood to enhance the possibility of success when trying something new. A glass of wine or two helps things along, as well.

So keeping all this in mind, plus the time constraints of the evening, I narrowed the curriculum down to two irresistible bite-sized treats that most people have tasted but never made from scratch before: Potstickers (gyoza) and Chinese Almond Cookies.


* at least, that's the way I like to refer to myself on the good days, which truthfully are many. On the bad days, which are few, I can be found wailing on the floor, clutching the job section of the classifieds, beating my breast and tearing my hair. You know. The usual. ;)


Pictured: A warm batch of just cooked potstickers. Yum.

Potstickers (Japanese Gyoza Dumplings)

1 lb. ground pork
½ head Napa cabbage, shredded
1 large carrot, grated
3 green onions, finely chopped
1 tsp. fresh ginger, finely chopped
3 cloves garlic, finely chopped
5 Tb. vegetable oil
3 Tb. soy sauce
1 egg
cornstarch
water
wonton wrappers (commercially made ones are great & easy to find; I usually see them in the ‘salad’ area of the produce section)

For dipping sauce:

Soy sauce
Rice wine vinegar
Toasted sesame seed oil
Red chili flakes or Asian hot sauce
Sugar

Heat large skillet (make sure you are using one with a lid, as you will need it later) to medium high and add 2 tablespoons of vegetable oil. Add pork and brown in oil until meat is about halfway cooked. Add cabbage, ginger and garlic, and continue to stir until cabbage is wilted. Add carrot, green onions and soy sauce and stir for a minute longer. Break egg into skillet and stir quickly to combine with all ingredients. Cook 1 minute longer, then remove from heat and let cool. Spreading it on a plate and cooling it in the refrigerator for at least 30 min. is ideal, since this will allow filling to cool completely and the flavors of all the ingredients to combine.

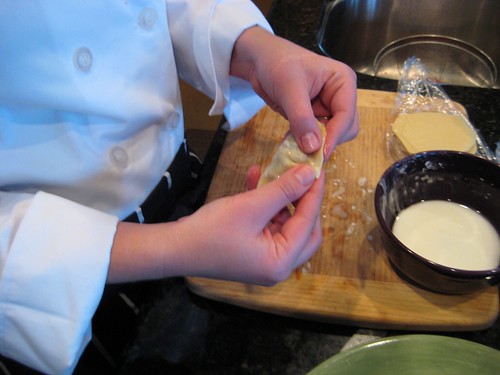
Prepare a small amount of paste of equal parts cornstarch and water in a bowl. Place a small amount of the cooled filling in the middle of each wonton wrapper, dip your finger in the cornstarch paste, and spread a little around the edges to act as ‘glue.’ Pinch wrapper closed to seal, pleating with your fingers as you go. Makes about 45 potstickers.

Heat large skillet to medium high, add enough vegetable oil to cover the bottom generously (roughly 3 Tb., you may need more or less than this). Add dumplings in a single layer, cook about 1-2 minutes on each side (check them frequently, turn when they have a nice brown layer on each side. Add water to skillet until it is ¼” deep (STAND BACK, adding water to hot oil sometimes causes splatters!), place a lid on skillet and let potstickers steam until thoroughly soft, about 3 more minutes. Remove from pan and place on serving plate.

Mix soy sauce, rice wine vinegar (in roughly equal amounts) in a small bowl, add a splash of sesame oil, red chili flakes/hot sauce and sugar to taste, mix thoroughly. Dip potstickers in this sauce & enjoy!


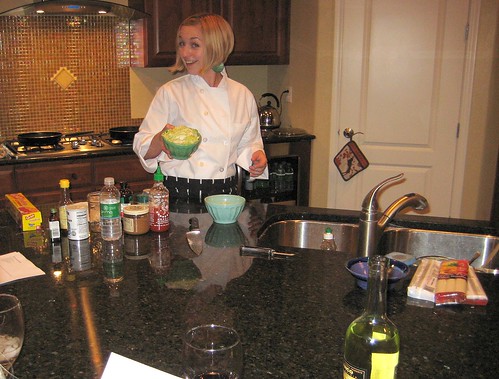
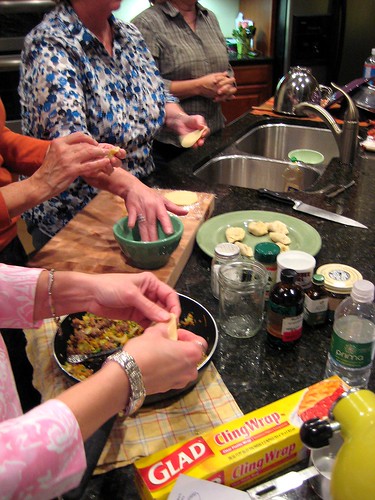
Chef Laurel lays out the lesson plan! It's interesting preparing for something like this, almost the way I imagine crews have to prepare for a cooking show. I laid out all ingredients in pre-measured amounts and had 'starter' batches as well as 'finished' batches to demonstrate with, in order to cut down on time. Lots of work!


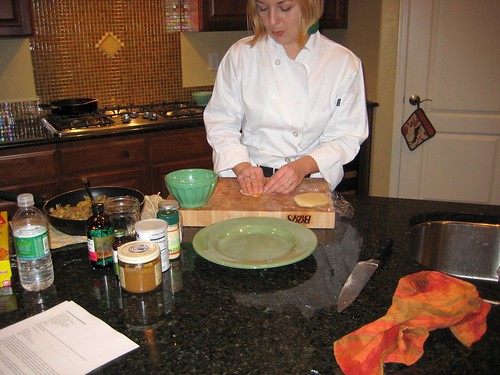
Demonstrating proper pleating & folding technique.


This is my best 'TV chef' face, ha ha! I'd like to think I'm channeling Martin Yan more than, say, Rachel Ray here, but either way I suppose it's a little cheesy. 'Look everyone......cabbage!'


After demonstrating a few myself..........


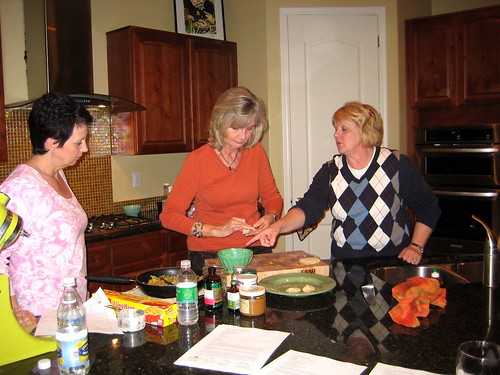
.......I put the ladies to work, assembly-line-style. Many dumplings were folded, and I'm proud to say none were lost. Such good students!


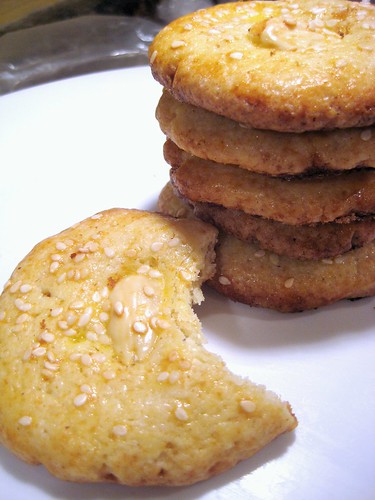
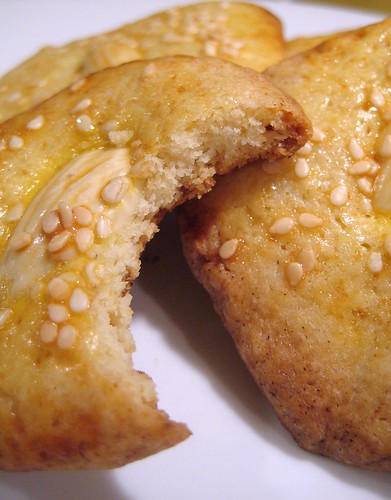
All in all, it was a great success. I'd love to do some more parties just like this! The group (about ten in all) was just the right size and eager to learn, and the dumplings and cookies (warm, almond-scented buttery treats, shiny with glaze and studded with sesame seeds) made perfect party snacks once we were done. They were challenging enough that no one had ever tried to make them before, but simple enough that they were amazed once they'd actually done it. Triumph!

So.

Chef Laurel is officially available for parties, should you need her. ;)


Chinese Almond Cookies


1 cup (8 oz.) butter, at room temperature
1 cup sugar
1 large egg
1/2 teaspoon almond extract
1/2 teaspoon vanilla
1/2 teaspoon salt
2 1/2 cups all-purpose flour
1 teaspoon baking powder
1 large egg yolk
1 tablespoon milk
1/2 teaspoon toasted sesame seed oil
1/3 cup whole almonds
2 tablespoons sesame seeds

Place whole almonds in a bowl and cover with boiling water until covered, to blanch. After 1 minute has passed, pour off water, rinse with cold water, and drain again. Slip almonds out of their skins and set aside.

Beat butter and sugar together in a bowl until smooth, either with an electric mixer or by hand. Add whole egg, almond extract and vanilla, and beat until well blended. Start beating in flour and baking powder a little at a time until you've added the full amount and dough forms. Wrap tightly in plastic wrap and chill for at least 1 hour, up to overnight.

Preheat oven to 325°. Divide dough into 48 small pieces, flatten each slightly into disks and place about 1 inch apart on lightly oiled or parchment-lined baking sheets.

In a small bowl, beat egg yolk with milk and sesame oil (really, make sure you get the toasted sesame oil, which is a lovely nut brown color and has a wonderful sesame aroma, rather than the pale yellow regular sesame oil, which has almost no taste at all) to blend. Brush the cookies lightly with egg mixture. Press an almond into the center of each cookie and sprinkle each lightly with sesame seeds.

Bake cookies in a 325° oven until lightly browned, 15 to 20 minutes. Let cookies cool on sheets for just a few minutes, then use a spatula to transfer to racks to finish cooling.


Sunday, March 14, 2010

Celebrating 'Pi Day' Two Ways............


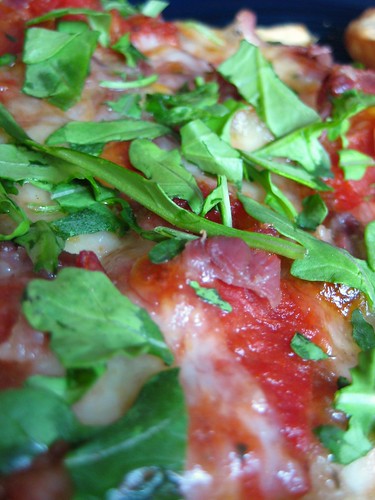
It's March 14th, also known as Pi Day (3/14), which means........I suggest we all get busy baking some pie! Sure, there are a world of options out there in pie-land, a thousand variations on fruit pies and other dessert pies to choose from, but before you become overwhelmed: consider the humble pizza pie. Perhaps not so humble, when topped with bits of prosciutto, a tomato-onion-butter sauce, and a tender blanket of fresh, green baby arugula.


This is the way we ate ours a few days ago, and I can think of no better way to honor Pi Day than by re-creating this wonderful pie. In about an hour and a half, this slice of heaven could be on your plate!


For the crust:


2 C. all-purpose flour
1 packet active dry yeast
1 C. warm water
1 tsp. salt
1 tsp. sugar
olive oil

For everything else:

1 can diced tomatoes (in tomato season, I'd use fresh ones, but in March you're much better off using canned tomatoes than the mushy, pale pink blobs they sell in the produce aisle)
2 tablespoons butter
1/2 red onion, chopped
3 cloves garlic, minced
salt/pepper/sugar to taste
small pinch of dried oregano
a few slices of prosciutto
1 ball mozzarella
baby arugula

To make the crust, combine warm water and active yeast in a small bowl, and set aside for 5 minutes. Combine flour, salt and sugar in another bowl, add yeast mixture, and combine until dough forms. Knead vigorously for 1 minute on a well-floured surface, then place in an oiled bowl to rise for 1 hour.

While dough is rising, heat butter in a saucepan over medium heat, add onions and saute until translucent. Add garlic and saute for about a minute longer, then add tomatoes and cook for about 25 minutes, stirring occasionally, until tomatoes just begin to relax into 'sauce.' Taste & adjust seasoning with salt/pepper/sugar as needed, then set aside to cool.

When dough is ready, preheat oven to 450 and prepare a baking pan by liberally covering it in olive oil. Stretch dough to desired size/thickness in pan, sprinkle lightly with salt, pepper, and dried oregano, pat into crust. Spread sauce thinly over crust, then cover with slices of mozzarella. Finally, add small pieces of prosciutto. Place in hot oven and cook until cheese is bubbling and browned in places (about 20 minutes, but your milegae may vary, so keep a close eye on it). Remove from oven and allow to cool slightly, then cover with a generous handful of lightly chopped baby arugula. Slice & serve!

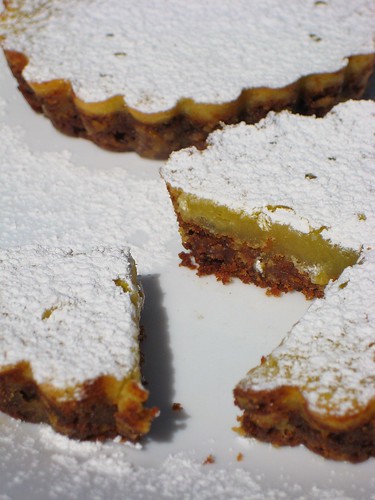
But what to serve after this perfect pizza pie, your sweet tooth cries? Smooth mozzarella, salty ham and the perfectly peppery bite of arugula leaves are all very well, thankyouverymuch......but what if your soul still cries out for dessert on Pi Day?? Okay. Maybe, if you happen to have a neglected lemon kicking about in the kitchen, a handful of other basic ingredients, and some adorable little tart pans, maybe you can make Lemon Tarts for Two.


Lemon Tarts for Two

2 tablespoons cold butter, cut into small pieces
4 tablespoons all-purpose flour
2 tablespoons brown sugar
2 crumbled gingersnap cookies
pinch of salt
juice of 1 lemon
1 egg
2 tablespoons powdered sugar, plus extra for dusting


Preheat oven to 350. Place butter, brown sugar, cookies, salt and 2 of the 4 tablespoons of flour in food processor and pulse until everything is combined and crumbly. Press into two mini tart pans to form crust, and bake until lightly golden brown, about 15-20 minutes, then remove and lower heat to 300.


Beat egg and lemon juice together, then add sugar and combine until dissolved. Finally, beat in remaining 2 tablespoons of flour until the mixture is creamy and no lumps remain. Pour into tart pans and bake at 300 for about 20 minutes, or until lemon filling is just set. Remove from oven and let cool thoroughly, then dust lightly with extra powdered sugar. Share with the one you love. :)