Saturday, July 3, 2010

The Slackers.


They hang around our kitchen like a gang of delinquents and old fashioned drug-store hooligans (arousing the kind of fist shaking and rage from me that inspires such phrases as drug-store hooligans). They lean against my counters and shelves casually cracking gum and occasionally raising an eyebrow in my direction, as if to say, 'Whadda you want? Wanna make a cappuccino? Oh yeah. We both know that ain't happening, lady' (my cappuccino maker is, mystifyingly, from Brooklyn) 'I been sittin' here for two years now, you ain't foamed or steamed a thing.' They are The Slackers. Allow me to introduce this colorful cast of characters.


The Crème Brûlée Kit. The ramekins that came in this box assimilated immediately, like work-eager immigrants, into the general population of the kitchen. After all, they are helpful little ceramic vessels when it comes to holding condiments or a pinch of chopped herbs, or in which to whisk a quick vinaigrette before tossing it on a salad. But this was a Crème Brûlée Kit, after all--we had high hopes of making our own classically French, creamy vanilla-infused custards with the perfectly caramelized crunchy tops. Which brings us to the crème brûlée torch. This would be used, except for one crucial thing.

We need to buy butane.

'We need to buy butane!', we remind each other every time the 'hey, wouldn't homemade crème brûlée be nice' urge strikes, and much earnest hand-wringing commences. This is, of course, because butane can obviously only be purchased at the far-away place known as The (Just) Butane Store, or better yet hand-harvested by moonlight by squeezing it drop by drop from the delicate petals of endangered Alpine flowers. It's certainly not readily available at every grocery store, everywhere, if only you could remember ahead of time to put it on the grocery list and actually buy some. That can't be it.

Another word on those torches. Almost everyone I know that owns a kitchen torch (listening to that, it sounds like I know a whole horde of torch-wielding fellow chefs, doesn't it? Actually, off the top of my head, I can't actually think of one, except for us......surely they must be out there, ignoring their crème brûlée torches just like we do?) owns it for the sole purpose of putting the traditional burnished sugar crust on the tops of crème brûlées--and absolutely nothing else. What else do you do with it? Brand your name into a steak? Some extreme kitchen ant removal? A spot of light weeding in the backyard? Suggestions, both funny and serious, will be entertained. After all, we're going to buy butane. Someday.


The Potato Ricer. This is one of those funny things that I don't think I actually believed existed, growing up (we were strictly a potato masher family). Then somewhere along the line, I was made dimly aware of its existence but I had the idea that it was some torture device for somehow combining both potatoes and rice into some uber-starchy American side dish nightmare. Finally I learned the truth, probably via Alton Brown and some believable scientific evidence on glutens, that it was the only way to make fluffy, sublime mashed potatoes that would sit on your fork like heavenly clouds and not line your stomach like rocks.


The word on potato ricers is this: because they force warm, cooked whole potatoes through tiny holes, also incorporating air along the way, 'mashed' potatoes produced this way are finer, more even, and lighter in consistency than those glutinous lumps made more traditionally with a masher. This supposedly makes wonderful mashed potatoes, the Platonic ideal of all mashed potatoes according to some ricer enthusiasts. I must say 'supposedly' because, despite having had one taking up valuable real estate in my kitchen for the better part of a year, we have yet to make a single batch of mashed/riced potatoes. But I hear they're delicious.

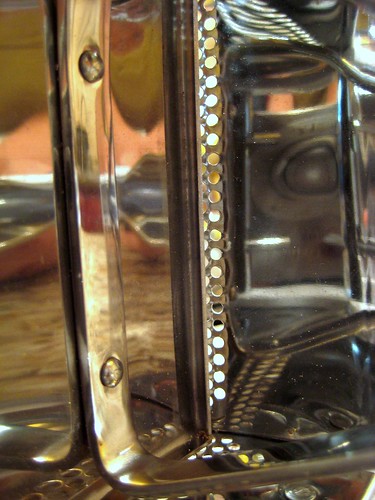
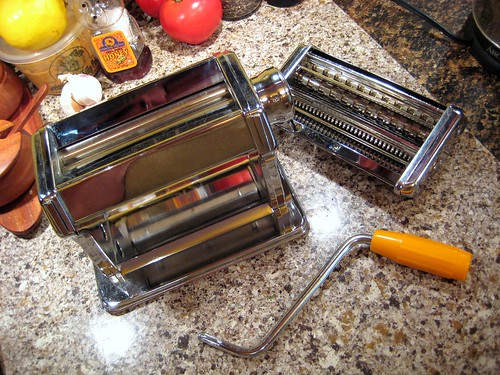
The Pasta Roller. This one is a relative newcomer to the gang, having spent only a few weeks so far on my kitchen counter, but he's already starting to make me uneasy. He actually belongs to my parents, and I've been angling to borrow him for months now with ideas towards making fresh golden sheets of pasta in which to tuck tiny lumps of savory ravioli filling, or else tall, twisted piles of tender linguine. But I'm nervous. The pasta roller bears suspicious signs of under-use, and I had to retrieve it, in its box and under a thin layer of dust, from the back of a kitchen cupboard at my parents' in order to borrow it in the first place. He may turn out to be a Slacker yet. But in the meantime, I'm leaving him out in plain sight on the kitchen counter as a subtle reminder to put him to work soon. Does anyone out there have a good ravioli recipe?


The Cappuccino Maker. I'm not sure whether this should make me feel more or less guilty, but we acquired this secondhand from some well-meaning friends. Less guilty because after all, it was free, but perhaps more guilty because they were passing it along after having discovered that, much to their surprise, they never used the thing. When they offered it to us, I swore up and down that I'd be different. After all, I love coffee. My husband, a tea drinker, does not, but I drink plenty of it daily to justify owning a--free!--cappuccino maker. And so we took it. And it turns out that while I do love coffee, what I actually love is my morning French press routine (Boil. Dump. Plunge. Drink.), and not fiddling around with handles and pitchers and steamer wands before my eyes have even opened properly. And so it sits.

I'm considering passing it along to someone else who will no doubt leave it sitting on their own countertop for another two years, until giving it to someone else and so on and so on until one day, two thousand years from now, alien archaelogists will uncover it from the rubble and wonder how such a thing could be simultaneously so old and yet appear so completely untouched. And then, most likely, they'll take it home and put it on their own countertops and proceed to not use it themselves for two years.
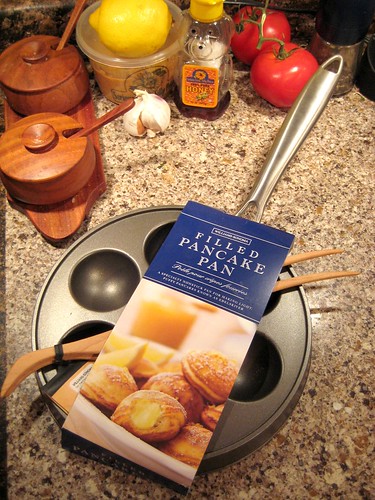


The Ebelskiver Pan. Look, I don't know how many of you are married, but there is this crazy thing that sometimes happens around the pre-marital time, and it is known as 'the wedding registry.' And it makes even the most level-headed folks a little overly ambitious, to say the least. Worse yet, there is an evil presence out there in the world that preys on these folks just as wedding planning is making them soft and weak-minded......and his name is 'WILLIAMS-SONOMA.' Beware of Williams-Sonoma. Williams-Sonoma will show you things like The Ebelskiver Pan and make you believe that not only would you perhaps like to own one (once you figure out what it is in the first place), but that you will actually need one for the weekly brunches you will be whipping up every Sunday morning for friends & family, just like the ones shown in the two-page catalog photo spread. This is because Williams-Sonoma is, in fact, an evil and dangerous demon from hell. Be ye warned, hapless newlyweds! Don't go into the woods.
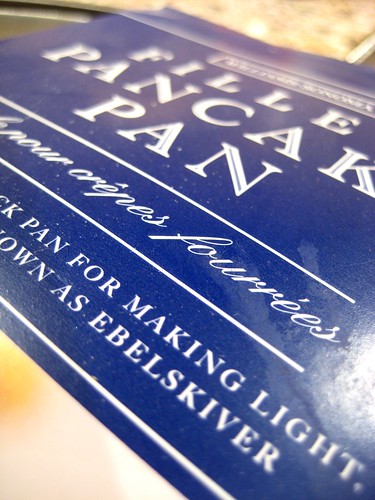

Look, okay, I actually like the idea of the Ebelskiver pan quite a bit. According to the photos, it makes adorable little round pancake nuggets, filled with anything from jam to goat cheese to Nutella, and it has an adorable name on top of everything else. And the lady who bought us our particular Ebelskiver pan is awesome, and...and......and we're going to use it. Really! Before our first wedding anniversary, I swear that there will be adorable pancake nuggets, or my new nickname isn't Ebelskiver Jones. Which, by the way, I really think it should be.

So this, apparently, is my challenge. Round up The Slackers and put them to work, or kick them to the curb once and for all! Will there be cappuccinos? Freshly extruded ravioli or riced potatoes? Plump, steaming ebelskiver? Or will there only be failure, degradation, and red-faced gadget-induced shame? Stay tuned, dear readers. Stay tuned.

Saturday, June 19, 2010

Hot town, salads in the city............


Back of my neck getting dirty and gritty, indeed. It's hot here. Summer is cranking up to full blast here in mid-June Phoenix, and everyone's feeling the effects. We're constantly fanning ourselves. My little dog spends most of his time limp on the floor like a steak frying on a grill--I know how he feels. You could, in fact, fry an egg on the sidewalk.......but I wouldn't want to eat it. In fact, there's an awful lot of cooking I don't want to do these days--whether it be on sidewalk or stovetop--but of course we still have to eat, and there's a limit to the number of garden-variety green salads I can eat over and over again. What is the solution? How do we go on without firing up the stove? Is this going to be a cooking blog without any cooking, or what??

My dear readers, let me show you the way.


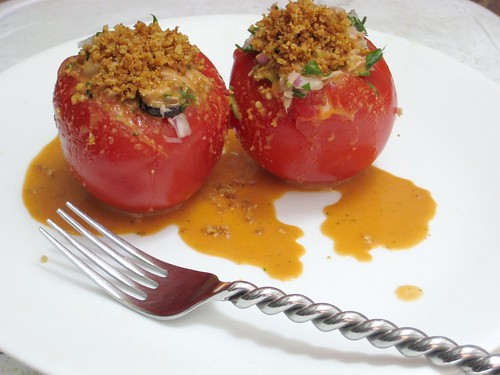
Mediterranean-style stuffed tomatoes are the answer to everyone's green salad ennui (come to think of it, it solves a few problems with traditional 'tuna salad' as well, mainly that it's not oozing mayonnaise from every pore), as a light and delicious lunch packed with light protein and stunning flavor. Take several fat red tomatoes, carefully remove the stem end and core with a sharp knife and gently squeeze the tomato innards, seeds and all, into a bowl and set aside. This step is especially satisfying, I find. Squeezing things tends to have that effect.


Next, you spoon into the freshly excavated tomato cavities a sharp and well-balanced mixture of tuna, kalamata olives, fresh cilantro and minced red onion. Finally, you top it with a crunchy cap of buttery, toasted bread crumbs (okay, you will have to use your stovetop for sixty seconds to make these, but it's worth it) and drizzle over top a homemade tomato-olive oil vinaigrette. It's tasty, it's fast, it's healthy, and it's so much easier to look forward to than tucking into yet another bowl of green leaves!


Oh yes. My feelings on salad. Did I mention that I get what I like to think of as 'salad fatigue'? I can't help but think, during the salad days of summer, of Jeffrey Steingarten's hilarious 1997 essay 'Salad, the Silent Killer,' in which he debunks the myth of the 'healthy salad' by cataloguing all the various toxins, mutagens and carcinogens lying in wait in the depths of our bowls. In addition to which, he adds, these salad eaters with their 'heads bowed, snouts brought close to their plastic wood-grained bowls, crunching and shoveling simultaneously' are unfeelingly keeping him from his dessert (read the entire essay here). He was kidding. I think. It's hard to tell, it's Steingarten!

I eat big bowls of green leaves (sometimes the traditional lettuce but not often, if we're going to eat bowls of leaves around here we like to stick to things that I think of as having more nutrition, like spinach, cabbage or arugula) and various vegetables dressed in homemade vinaigrette pretty often. It's tasty. It's virtuous (well, except on those days when bacon or sauteed chicken livers manage to sneak themselves into the bowl). It's also extremely boring, and I get fatigued with my big bowls of salad faster than I ought to admit, but I'm admitting it now. But there is hope! There is a light at the end of the salad tunnel, my friends, and it is THIS SALAD:


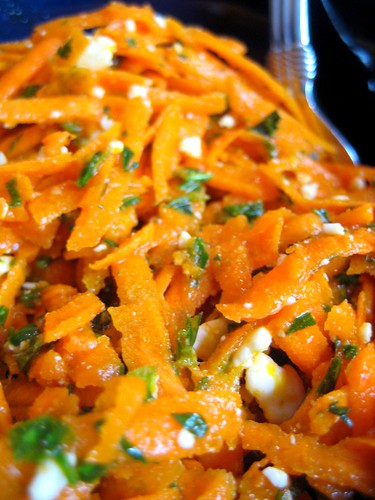
.......which has two wonderful things going for it. First, that it is plainly not made of boring green leaves but of vividly orange scraps of carrot and other wonders peeking out from underneath, herbal flecks of green, salty white glints of feta cheese. Second, that it is a recipe from the Smitten Kitchen blog (originally posted here), and it's just nearly impossible to go wrong with a recipe from Deb's kitchen. That woman knows a gem when she sees it, and her 'Carrot Salad with Harissa, Feta and Mint' is a summertime gem indeed.

This salad is earthily sweet in the way that good raw carrots often are, balanced perfectly by the sharp tang of lemon juice and crumbled feta cheese. The mint, parsley and blend of spices in the dressing give this dish a fantastic North African flavor, and the swell of heat lurking in its depths (how spicy you make this is, of course, up to you) give it real authority, as well as helping you to cool down on a sweltering day. I never expected to have my mind blown by a carrot salad--a bowl of shredded carrots, come on!--but I bow before this recipe. My mind was blown. Salty, sweet, juicy, spicy, crunchy, earthy with spices.....and it was fantastically simple to make! Thirty minutes after having eaten it for the first time, still full from that first bowl, I was nonetheless craving it again.

Come to think of it, I'm craving it now.

I think it's time for lunch. No cooking required.


Mediterranean Stuffed Tomatoes

(serves 2 comfortably for lunch)

4 ripe, round tomatoes
2 cans water-packed tuna (this actually made slightly more tuna salad than we could stuff into 4 tomatoes, but your mileage may vary. We were happy enough to scrape up and eat the leftovers straight from the bowl)
2 tablespoons sliced kalamata (or other variety) olives
2 tablespoons chopped cilantro
2 tablespoons minced red onion

2 tablespoons olive oil
1 clove of garlic, crushed
splash of balsamic vinegar
salt and pepper

2 tablespoons bread crumbs
1 tablespoon butter (or olive oil, or a mixture of both, whatever suits you)

Carefully remove the stem end and core from each tomato with a sharp knife, leaving the bottom intact so that the tomato form a 'bowl' shape. Gently squeeze the seeds and water from each tomato into a mixing bowl, set aside. In another bowl, combine tuna, olives, cilantro and onion. Spoon this mixture into the 4 hollow tomatoes.

In a food processor or blender, blend the 'tomato innards' with olive oil, garlic, and a small amount of balsamic vinegar, salt & pepper to taste, until well pureed.

Finally, in a small skillet, heat butter or olive oil over medium high heat. Add bread crumbs, stir to coat thoroughly. Cook briefly until bread crumbs are toasted to a light nut brown color, then remove from heat immediately. This takes very little time (maybe a minute or two, maybe less, depending on the kind of bread), so keep a close eye on it.

Drizzle stuffed tomatoes with the vinaigrette, then top each with a sprinkling of butter bread crumbs. Enjoy!

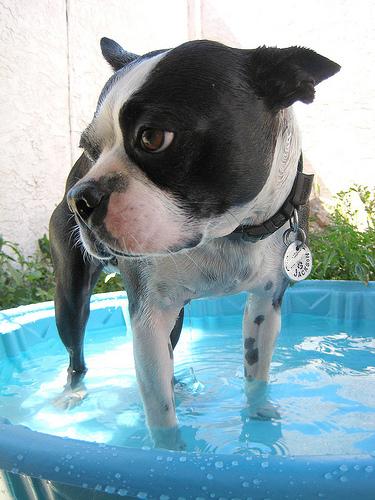
P.S. - If these recipes don't help to cool you off, you can always try what my little dog does when the heat is just too much! Stay cool out there, readers.......... :)


Monday, June 14, 2010

Dumplingboy: The Mighty Gyoza!

I love dumplings of all kinds. I mean, I really, really love dumplings. I'm not sure I can adequately explain to you using just words how very much I love dumplings.
Maybe Dumplingboy can explain it for me.


...........I made him. And even though he's made of flannel and stuffed not with juicy pork, tender scallions and Napa cabbage but fluffy polyester stuffing, I'm having a hard time not taking a bite out of him just the same! I love you, Dumplingboy.

Wednesday, June 2, 2010

Pambiche-style Cuban pork tenderloin with black beans, fried plantains......and FLAN! Did I mention flan??


Once upon a time, back in ol' 2007, the husband and I journeyed to Portland, Oregon and fell in love. Not with each other, that is, we were already madly in love with each other......with the place and its people, its weather, its public transportation system, and its many, many wonderful restaurants. We had only to ask a stranger walking down the street or riding the bus next to us what was their favorite restaurant/artisanal bakery/microbrew pub and not only would we receive an immediate answer, but a handful of runners-up in case the one they had suggested was closed, too far a walk, or simply not our cup of tea (or house-roasted fair trade coffee). These people are opinionated and take their eating and drinking seriously. In the case of the man who first directed us to Pambiche, he didn't merely give us the address of the restaurant, he walked us from the streetcar we had all been riding together to the stop where we'd meet the bus we needed to take, gave us detailed directions as to where to transfer and where to get off, suggested what to try on the menu, and sent us on our merry way--with coupons!

He didn't work there. I think.

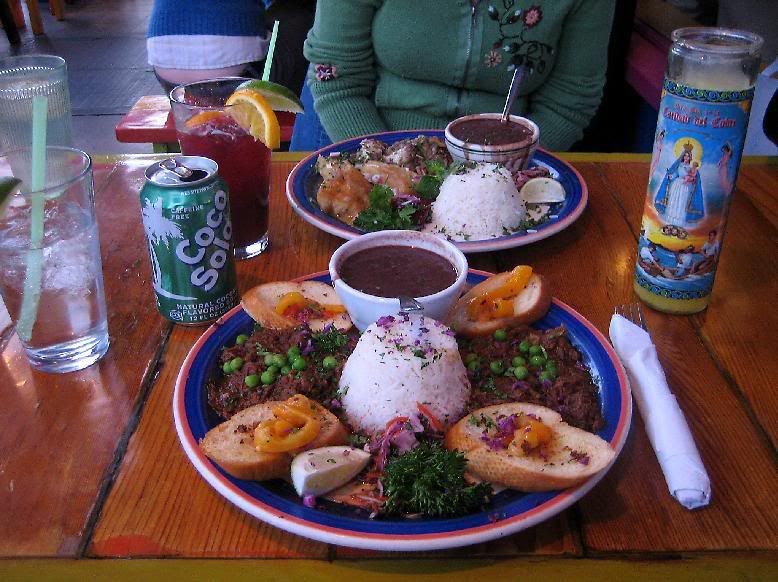
Cuban-style Pambiche (it's located at 28th & Glisan, Portland people) won us over immediately with its gloriously vibrant paint job, inside and out, its lively music & atmosphere, and......oh yeah, the food, have I mentioned the food? Amazing. See?? I had a plate of marinated roast pork with black beans and fried yucca slices that I still dream about to this very day.


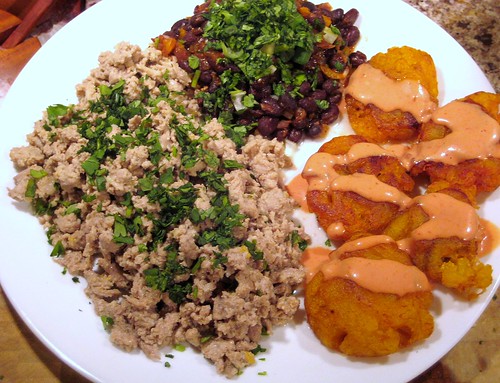
In honor of our very first Pambiche dinner (which has since been repeated a few times, although sadly not as often as we'd like, since we live in Phoenix), Mike and I recently re-created a Cuban style feast at home. We marinated a pork tenderloin for hours in a bath of lime juice, olive oil, cumin and garlic, then sauteed it lightly and served it with fresh cilantro. There was a sofrito-based side of spicy black beans. And there were.......(happy sigh).....fried plantains.


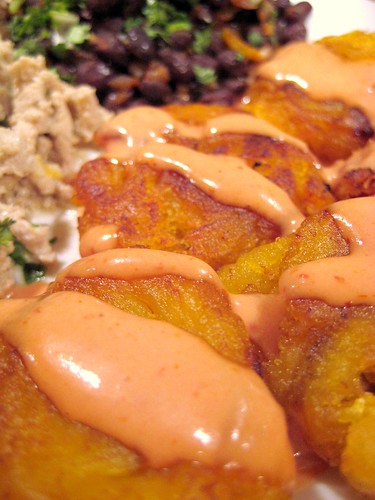
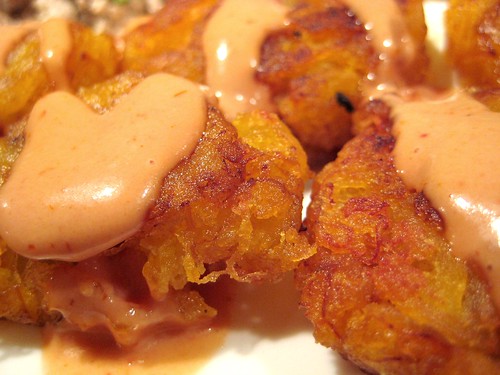
Fried plantains with Mike's special 'pink sauce.'


Black beans stewed with sauteed onion, garlic and sweet bell peppers from my garden, seasoned with cumin, chili powder, and a splash of lime juice.


The best way to make fried plantains that we've found is Alton Brown's way (isn't that usually the way it goes? Recipe follows at the end of this entry). Alton prefers that you use green plantains, the ones that resemble a very unripe banana. They're quite a bit firmer than the ripe version, which makes absolute sense when you get to the step where he has you soak them in garlic-enhanced salt water, albeit briefly. Trust me, soft, ripe plantains cannot abide this particular step (ask me how I know, go on, ask me how I know!) and will crumble on you, so stick with the green ones. Once they're cooked they are tender, garlic scented perfection, golden and crispy on the outside but soft and yielding to the teeth on the inside.


And the best part is, you can use the leftover bits of pork and black beans to make Cuban tacos the next day! Win!

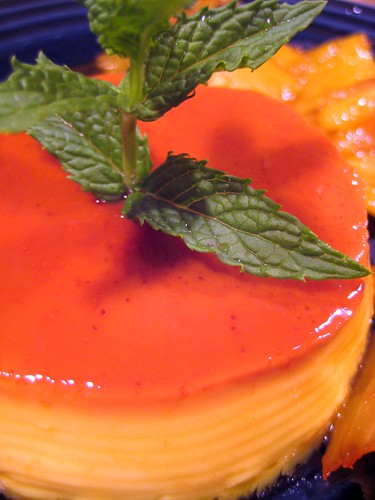
If you're somehow still hungry after dinner (and I promise I won't tell on you if you are), you can cap things off perfectly with a beautiful little flan, just like we did on our first night at Pambiche. They're made in tiny individual ramekins, so you won't feel like you're devouring a huge dessert portion all by yourself (unless, that is, you eat your partner's as well!). And there's fruit and greenery, see, pineapple, mint? If there's fruit it must be healthy! Cheers.


Flan with Caramelized Pineapple

1 1/3 cup sugar (divided into two 2/3 cup portions)
3 cups whole milk
1 teaspoon vanilla
4 large eggs

1 cup fresh pineapple, sliced into small chunks
1 tablespoon butter
1 tablespoon brown sugar
pinch of salt

fresh mint for garnish

Place 2/3 cup of sugar in a small saucepan and add just enough water to dissolve it, about 1 tablespoon. Heat on medium heat, swirling the syrup in the pan occasionally, but never stirring it. The syrup will boil for a while until it starts to turn brown. The trick to making caramel is to watch it carefully and to remove it from the heat while it's still a shade lighter than you'd like it to be (caramel keeps cooking in a hot pan, even as you're pouring it into the ramekins it's still cooking.......it can also burn in seconds, go on, ask me how I know this!). Once it has turned a very light nut brown, remove it from the heat and immediately pour the caramel into the bottoms of 6 ramekins. Set aside.

In another saucepan, heat the milk with the other 2/3 cup sugar until it reaches a boil. Stir in vanilla. In a mixing bowl, whisk the eggs for about a minute. Whisk in the hot milk, in very small amounts at first to avoid scrambling the eggs (this process is called tempering). Pour the milk mixture into the ramekins on top of the caramel. Place all 6 ramekins in a large oven proof dish. Fill the dish with water to about 2/3 the height of the ramekins.

Carefully place in 300° F oven. Bake for 40 minutes to an hour (bake until custard has set, test with your finger or by gently inserting a knife); make sure the water surrounding the ramekins does not boil during baking. Allow the custard to cool completely, then refrigerate.

To make the caramelized pineapple (you can do this while the flan is cooling), heat butter in a pan over medium high heat. Add pineapple, allow the pieces of fruit to cook until they are just beginning to brown on either side, stirring occasionally. Add brown sugar and pinch of salt (taste for correct amount) and stir for 30 seconds more, then remove from heat and let cool slightly.

To serve, run a knife just along the inside of each ramekin, then turn flan over onto a dessert plate. Surround with caramelized pineapple bits, garnish with fresh mint (this last step is, of course, completely optional. I happen to have an enormous, bushy mint plant that is slowly taking over the backyard--we call it MINTASAURUS--and so we use mint whenever the opportunity presents itself! Plus it makes it look all the more festively Cuban). Enjoy!


Fried Plantains, Alton Brown-style (original recipe from 'Good Eats' shown here)

Ingredients

2 cups water
3 cloves garlic, smashed
2 teaspoons kosher salt, plus extra for seasoning
1 1/2 cups vegetable or canola oil
2 green plantains

Directions

Combine water, garlic and salt in medium size glass bowl and set aside.

In a large (12-inch) saute pan, heat oil to 325 degrees F. Peel plantains and slice crosswise into 1-inch pieces. Carefully add plantains to oil and fry until golden yellow in color, about 1 to 1 1/2 minutes per side (the oil should come halfway up the side of the plantain). With a spatula or slotted spoon, remove the plantains from the pan and place them on a cookie sheet lined with parchment paper, standing them on their ends. With the back of the spatula, press each piece of plantain down to half its original size. Then place the plantains in the water and let soak for 1 minute. Remove and pat dry with a tea towel to remove excess water.

Bring oil back up to 325 degrees F and return plantains to pan and cook until golden brown, approximately 2 to 4 minutes per side. Remove to a dish lined with paper towels, and sprinkle lightly with salt. Serve immediately, with pink sauce*.

(*Pink sauce is a creation of my husband's, some version of which I believe he may have originally gotten from Jacques Pepin. It's an easily made condiment and it tastes good on everything--french fries, avocado slices, sandwiches, fried plantains, everything! Take equal parts mayonnaise and ketchup and mix thoroughly with liberal amounts of hot sauce, to taste. The preferred hot sauce around the Orange & Salt kitchen is Arizona Gunslinger, but we understand if you don't, you know, live in Arizona and can't get your hands on some. Chipotle-style Tabasco is also wonderful.)

Thursday, May 27, 2010

Somewhere, on a time-traveling island...........


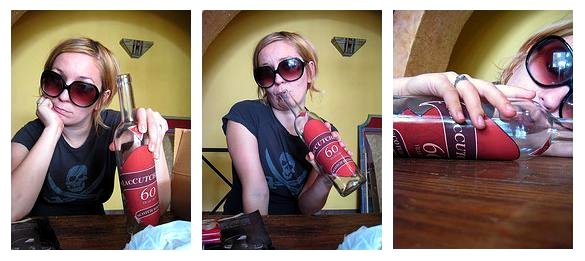
.......this blogger consoles herself over the end of her favorite long-running tv show with a bottle of sixty year old 'MacCutcheon whisky.'

Sigh.

Once upon a time, back in 2005, a group of my friends convinced me to start watching a tv show. I hated it at first. There were too many characters to keep track of, plus flashbacks, relationships, jungle monsters and polar bears. I complained week after week. Until, that is, I found myself loving our weekly get-togethers (at which dinner and good post-show conversation were always a main feature) centered around the show, and loving the show for its many 'Oh-my-God-did-you-just-see-that??' moments. Finally, I was just plain hooked.

Now it's 2010 and my group of friends, like our weekly LOST nights, have scattered and changed. And as all good things must, LOST itself came to an end this week. While I may no longer have a crew of rowdy 20-somethings with which to watch my favorite television show (toasting with a raised can of beer every time Jin said something in Korean, the smoke monster appeared onscreen, or Michael screamed for 'WAAAAAAALLLLLT!!!!'), I do have my trusty and beloved husband. He has watched every single episode of this show right by my side (I believe it should have been in our wedding vows....'Will you love, honor and cherish her....and will you watch six seasons of her favorite sci-fi island soap opera with her with minimal complaint and without asking silly questions like what exactly the smoke monster is or why the hell the bald wheelchair guy can walk and the Southern guy has to nickname everyone?'), and I could think of no better way to close this chapter of my life than with one final LOST dinner night.


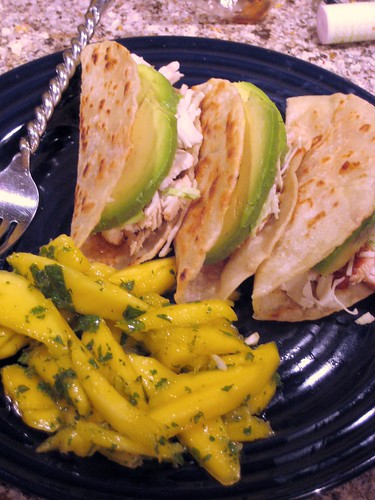
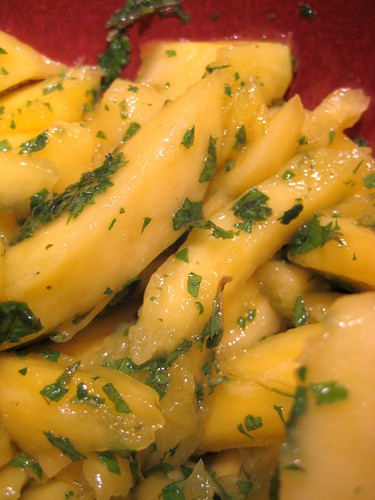
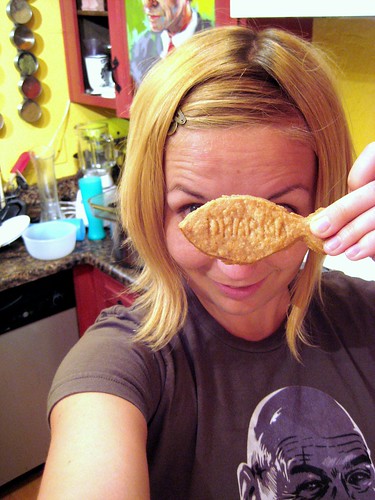
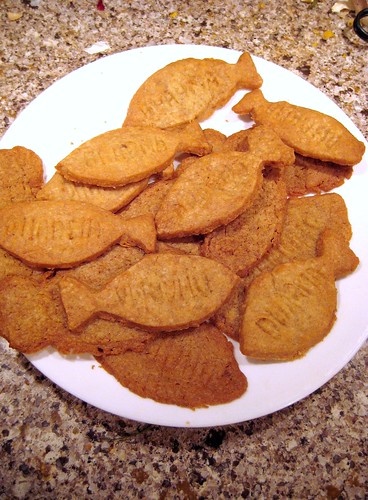
And an excellent dinner it was! We had mahi mahi tacos in honor of the late Jin Kwon, fisherman of The Island (and close runner-up for my favorite LOSTie*) with roasted tomato salsa, creamy avocado slices and shredded cabbage. We had a delicious sliced mango salad in honor of the seemingly neverending supply of mangoes provided by The Island, lightly dressed with a pinch of sugar, salt, and fresh mint. And finally, we had brown sugar shortbread 'fish biscuit' cookies, branded with the DHARMA logo, for dessert.


(* dude, I'm a Hurley girl for life.)


We had a great time watching the series finale. I'm not what you'd call a 'tv person' under normal circumstances; in fact, we cancelled our cable over a year ago, and the only television show I've bothered to keep up with regularly is LOST. In many ways, it's the end of an era. But in many other ways, it's just a tv show, and it's just as well that it came to an end when it did. The finale answered some of my questions about The Island, left many unanswered forever (no, really, what IS the smoke monster, dammit??), made us laugh (Mike) as well as cry (okay, me).


In order to truly look & feel the part of a crazed LOST fan, I wore my sweet 'WWJLD?' shirt. Please disregard the jammies and obvious bedhead.


Want to make your own fish biscuits, in tribute to the best show about a pair of feuding brothers, a time-traveling island, a handful of polar bears and about a thousand love triangles?? Well, now you can, brothah! These cookies are a twist on classic shortbread featuring brown sugar and a crisp, ever so slightly salty finish. They're as addictive as a Virgin Mary statue full of heroin, so beware--ours disappeared inside of two days!

DHARMA Initiative 'Fish Biscuits' (aka Brown Sugar Shortbread Cookies)

1 cup flour
1 stick (4 ounces) unsalted butter, sliced and chilled
1/4 cup brown sugar
1/2 teaspoon salt

Preheat oven to 300°, and line a cookie sheet with parchment paper. Using a food processor, pulse the flour, butter, sugar and salt until dough barely begins to come together like damp island sand!

Turn out mixture onto a work surface and gather into a smooth, compact ball. On a lightly floured surface, roll the dough into a 7-by-9-inch rectangle, about 1/4 inch thick. Using a sharp knife, slice fish shapes out of shortbread dough. Set fish shapes on parchment-lined cookie sheet; I got about 16 but your mileage may vary depending on the size of your fish biscuits. Using a pointy instrument (I found a wooden chopstick to be perfect here), carve the word 'DHARMA' into each cookie.

Refrigerate the tray of cookies for 20 minutes. Remove from refrigerator and bake at 300° until light golden brown, about 20 minutes. Let cool for 10 minutes, remove from tray and enjoy. Namaste (.......and good luck)! :)


Goodbye, LOST! We'll miss you!

Thursday, May 20, 2010

Vietnamese Duck Noodle Soup, from Bon Appétit magazine, May 2010


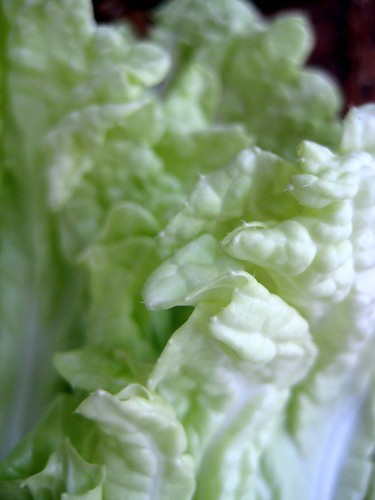
'It's so pretty, Napa cabbage. So ruffly and drapey.'

I held a few of the loose, ruffled leaves against the leg of my jeans and sighed, considering them.

'....I think if I was going to make a dress out of any vegetable at all, it would be Napa cabbage.'

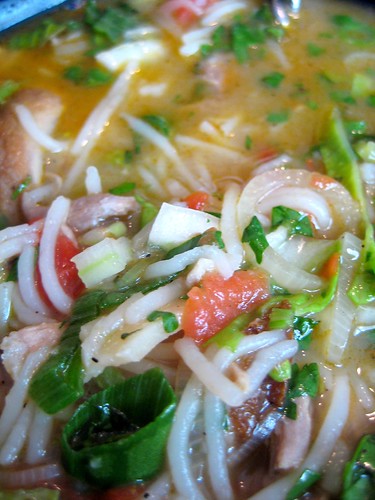
My husband, who knows me well enough by now to know that this isn't even remotely crazy talk coming from me, wisely held his tongue and kept slicing shallots and chopping mint. He's a smart man. It is very pretty though, Napa cabbage, although when it comes to uses I recommend eating over eveningwear. And what better way could there be to eat it than sliced into delicate ribbons and swimming in spicy broth and tender noodles, a few golden shreds of duck meat, diced tomatoes, and a sprinkling of fresh herbs decorating the surface?


This recipe for Vietnamese duck noodle soup (also known as bun vit mang), from the May issue of Bon Appétit magazine, is built on a solid foundation of flavors: first of all, duck. Yum. I think it's only fair to tell you that you might, in the absence of duck, be able to build a perfectly respectable soup on, say, chicken. But it's going to be missing that inherently wonderful, rich, ducky quality. Don't cheat yourself. It's a little difficult to find at our usual supermarkets (at least it is in our Phoenix suburb, your mileage may vary if you're in a more duck-loving corner of the world?), but we can always, always find duck legs at our local Asian specialty supermarket, so look around.


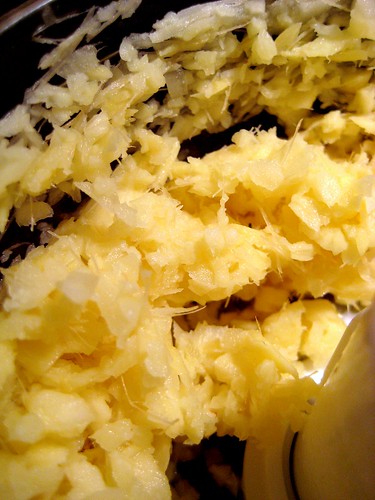
The second fundamental building block in this complex soup is a large quantity of good, fresh ginger. Ginger is one of those rare food items (really, it's a short list) that I always claimed not to like, having tasted funky, limp pinkish pickled ginger slices too many times at too many cheap sushi joints and declaring it to 'taste like window cleaner.' I don't remember when I changed my mind, but I do know that it was fresh ginger that cracked that particular prejudice wide open. Fresh ginger is a juicy, tongue-prickling wonder, a staple around the Orange & Salt kitchen whenever we're cooking anything remotely Asian in flavor. It's also basically a superfood that is reported to do just about everything from curing indigestion, nausea, and cold & flu symptoms to lowering levels of 'bad' cholesterol so eat your ginger--but stay away from the pickled, cheap-sushi-joint stuff! It really does taste like window cleaner.


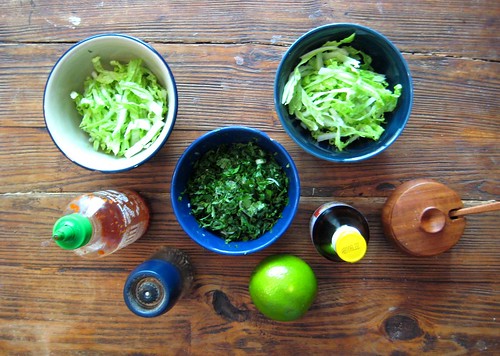
Finally, I would say the balance of flavor in this wonderful soup is made up by all those fantastic garnishes, piled on in traditional Vietnamese mix-and-match style, to suit the individual taste. It's a lineup of the usual suspects of Southeast Asian cuisine: fish sauce, hot chilis, mint, cilantro, bright & zingy lime juice, etc, and all the tangy-hot-spicy-sweet helps to liven up the rich, fatty soup base incredibly.


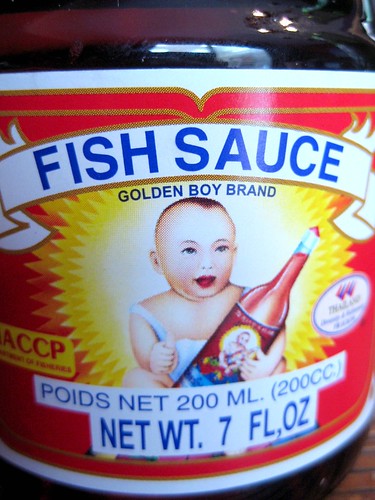
I couldn't resist including this photo, since we tried a new brand of fish sauce this time around, and I think the smiling, lipstick-wearing, thumbs-up baby fish sauce spokesmodel is hilarious. 'Heeyyy, try my fish sauce!' :)


What you will start with: a full to the brim bowl of juicy, spicy, crunchy, ducky goodness............


........and what you will end with: a very clean bowl. A happy, warm belly. And an overpowering urge to make this soup again, in the very near future.

Vietnamese Duck Soup (from Bon Appétit, May 2010)

6 servings

Ingredients:

Soup

6 duck leg-thigh pieces
16 cups low-salt chicken broth
1 large onion, peeled, halved
6 tablespoons finely chopped peeled fresh ginger
2 tablespoons (or more) fish sauce (such as nam pla or nuoc nam)*
1 tablespoon sugar

Garnishes

1 6.75-ounce package rice vermicelli
3 cups sliced shallots (about 10 large)
2 1/4 pounds plum tomatoes, chopped
3 8-ounce cans sliced bamboo shoots, drained
6 cups thinly sliced Napa cabbage
1/3 cup chopped fresh mint
1/3 cup chopped fresh cilantro
1/3 cup chopped fresh chives
Hot chili sauce (such as sriracha)
Lime wedges

Heat heavy large pot over high heat. Sprinkle duck with salt and pepper. Add to pot; sauté until deep brown, about 6 minutes per side. Add broth, onion, ginger, 2 tablespoons fish sauce, and sugar; bring to boil. Reduce heat; simmer uncovered until duck is very tender, adjusting heat to maintain simmer, 45 to 60 minutes.

Using tongs, transfer duck to rimmed baking sheet. Cool 30 minutes. Skin and bone duck. Coarsely shred duck meat. Strain broth into large bowl; discard solids. Spoon fat from top of broth into small bowl; reserve. Return broth and duck to same pot. Can be made 1 day ahead. Chill soup uncovered until cold, then cover and keep chilled. Cover and chill duck fat.

Cook rice vermicelli in large saucepan of boiling water until just tender, stirring occasionally, 3 to 5 minutes. Drain, rinse with cold water, and drain again. Cut noodles in half to shorten.
Melt 2 tablespoons reserved duck fat in same saucepan over medium-high heat. Add shallots; sauté 3 minutes. Add tomatoes and bamboo shoots. Cook until juices thicken, about 7 minutes longer. Add tomato mixture to soup. Simmer until flavors blend, 5 to 10 minutes. Season with salt, pepper, and more fish sauce if desired.

Divide noodles, cabbage, and herbs among 6 large bowls. Ladle in soup. Serve, passing hot sauce and lime wedges.

Tuesday, April 27, 2010

I like big Bundts and I cannot lie.........


I like to think I'm an unconventional kind of gal. After all, I work as a painter for a living. I cut my own hair over the bathroom sink. I used to wear safety pins as earrings (yeah, it was an ill-advised phase in high school; I thought they looked wicked rad), and I've been known to make jewelry out of paper and feathers as well. I am what I think you'd call a 'fearless eater,' and there is almost no recipe on Earth that I won't at least try (unless it comes from the kitchen of Paula Deen, that woman terrifies me). But I must be more conventional than I realized, because as it turns out, I love to make Bundt cakes. Like, love it. There's something so satisfyingly structural about them, so finished from the moment they pop out of the pan. They're almost architectural, like desserts handsculpted by Buckminster Fuller (Google him, non-architecture nerds). And nine times out of ten, they need no more dressing to their curvaceous rounds and grooves than a simple dusting of powdered sugar, or the lightest back-and-forth drizzle of glaze. Oh yes. I like big Bundts (and ridiculously obvious blog post titles) indeed! So call me conventional.

Being the conventional, good wife-type that I am, as well as the recent recipient of a brand-new shiny Bundt pan (hooray for wedding showers!), I graciously and magnanimously allowed Mike to choose the flavor of our next Bundt. After all, I've put the man through so many of my kitchen phases in which I've been borderline-obsessed with learning to make my own bread or pasta or hot sauce or dumplings and nothing else, or the few months in which all I wanted to eat was hazelnut brown butter cake. Not wanting to be a kitchen dictator, I handed over the reins, and after a few minutes on Tastespotting (it's dangerous to linger there any longer) the verdict was in: Tiramisu Bundt Cake.


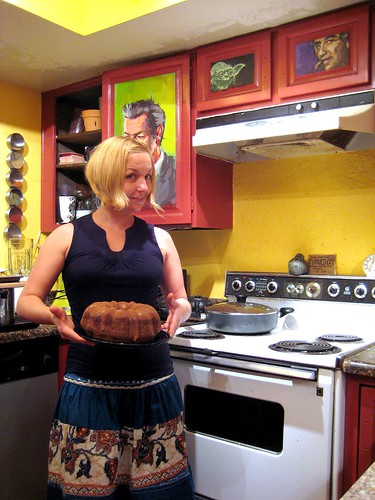
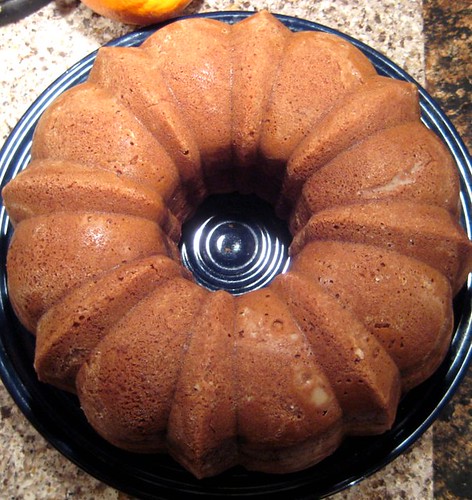
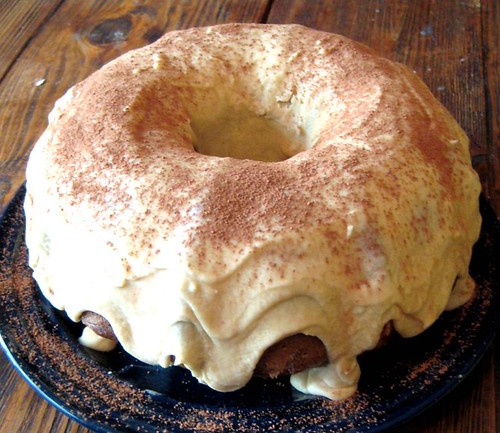
And look how pretty it is! David Bowie, Yoda and Peter Falk certainly seem to think so, anyway (there's a tantalizing peek into our weird, colorful little kitchen world for you). All golden brown, shapely perfection. Let's admire it for a moment, shall we?


Yes, yes, it's very pretty. But do you remember what I said before, the thing about nine out of ten Bundts requiring no further gussying-up than the lightest touch of powdered sugar or glaze? Well forget that, because this is the exception and I am about to cover this mother in a generous amount of boozy sweet mascarpone cheese--it is 'tiramisu' cake, after all! Farewell, glorious curves! It's for the greater good.


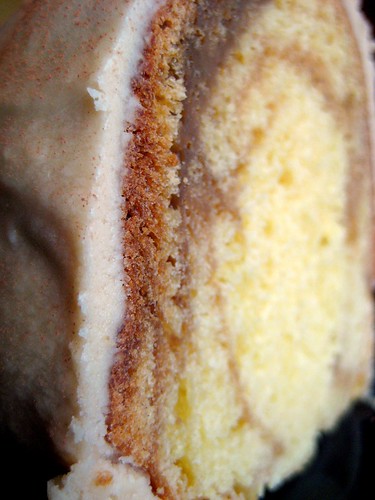
A slice of the finished product, in luscious detail.


It really looks more like an overgrown donut at this point than either a classic Bundt or a tiramisu, but hey. When there's this much creamy cheese, strong coffee and sweet sweet liqueur involved, how much do looks really matter?

Here's the verdict on the recipe: it's good. I love this particular combination of flavors, and I especially love the trick of separating this into three batches of batter (an espresso, a Kahlua, and a plain vanilla batter) and then marbling them together in the pan. It's pretty, and more reminiscent of a layered tiramisu than a cake that combined them into one homogenized mass would be. What I didn't love was the texture; even though I was warned by the original blog entry that this cake was a dense one, more like pound cake than classic vanilla sponge, I still wasn't quite prepared. We loved the taste but were hard pressed to eat more than a tiny slice each (although I have to admit to eating a slice right out of my hand the next morning with my coffee). Maybe I just prefer my desserts a little lighter in texture? Then again, a lighter cake might not be able to stand up to such a rich, heavy icing. More delicious research is obviously necessary!


Tiramisu Bundt Cake (adapted from original post here at Baking Bites)

3 cups all purpose flour
2 tsp baking soda
1 tsp baking powder
2 tsp salt
3/4 cup butter, room temperature
1 1/2 cups sugar
3 large eggs
2 tsp vanilla extract
1 1/2 cups milk
1/4 cup espresso (if you are fancy......lacking a home espresso maker, I substituted the same amount of my usual, superstrong, morning French press brew)
1/4 cup Kahlua

Preheat oven to 325F. Grease and lightly flour your Bundt pan. In a mixing bowl, whisk together flour, baking soda, baking power and salt. In a large bowl, cream together butter and sugar until light. Beat in eggs one at a time, followed by vanilla extract. Add flour mixture and milk to the egg mixture, a little at a time and alternating between each, mixing just until everything is incorporated.

Remove 1 cup of the batter into a small bowl. Remove another cup of batter into a second small bowl. Add espresso to one of the small bowls and whisk until well-combined. Add Kahlua to the second small bowl and whisk until well combined. Pour half of the plain batter into the Bundt pan and spread into an even layer. Pour the Kahlua batter into an even layer on top of the plain batter. Pour espresso batter on top of Kahlua batter. The flavored batters will be slightly thinner, and may spread into one another, but this will create a pretty 'marble cake' effect. Resist the temptation to mix or stir them. Carefully pour all remaining plain vanilla batter into the Bundt pan.

Bake 55-60 minutes, or until a toothpick inserted into the center comes out clean.

Let cake cool in pan for 15-20 minutes, then turn cake out onto a wire rack to cool completely before frosting.

Kahlua Mascarpone Frosting

1/4 cup butter, room temperature
4-oz mascarpone cheese, room temperature
1/4 cup Kahlua
2 cups confectioners sugar

Combine all ingredients in a mixing bowl and beat at medium-high speed until very smooth and fluffy. Use a butter knife or offset spatula to apply the frosting to the cake in a thick, even layer. This frosting is pretty boozy, hopefully that's your cup of tea. It didn't stop me from eating a slice for breakfast the next morning, as I mentioned, but you might not want to take all your cues from me. I'm unconventional. ;)