Showing posts with label dessert. Show all posts

Friday, August 5, 2011

Greetings From the Surface of the Sun!!

Drip.

Drip.

Drip.

That sound you hear isn't me sweating. It isn't my husband sweating, or even our little dog (he can't, poor thing). It's literally the liquid sound of the salty remnants of our sanity draining away slowly, one agonizing drop at a time. It's August in Phoenix, and it's HOT, and I don't want to eat anything but frozen treats.

With that in mind.......it's a perfect time for fruit sorbets! Nothing says summer like frozen watermelon with a hint of lime. This recipe will give you a delicious, cooling confection to help battle the summer blues, whether or not you have an ice cream maker (we actually don't--bad foodies!).


We had some adorable mini watermelons (I also like the term seen in the produce section of the local Asian supermarket where we purchased these: 'personal watermelon,' but it makes me giggle. It just sounds so....I don't know, intimate? This is my personal watermelon. Hee hee.), so I used those. Bonus bowl afterwards!


I recommend serving a scoop of watermelon sorbet nestled next to a creamy scoop of Haagen Dazs lemon ice cream, with a sprig of mint, in your own personal watermelon bowl. Bliss.

Fresh Watermelon Sorbet


1 cup sugar
1 cup water
5 cups fresh seedless watermelon chunks
6 tbsp. fresh squeezed lime juice


Bring the sugar and water just to a boil. Reduce the heat to medium low and simmer until the sugar is completely dissolved--do not stir or you will introduce sugar crystals and everything will get weird. Trust me. Set aside in a bowl until completely cool.


Put the watermelon chunks and the lime juice into a blender or food processor. Pulse several times to chop the melon and then process until the fruit is completely pureed. Press melon puree through a fine mesh strainer to remove the seeds and any extra pulp. Combine with the cooled sugar syrup. Chill in the refrigerator for 1 hour.


If you have an ice cream maker, pour the watermelon mixture into the freezer bowl, and process according to your manufacturer's instructions. If you don't have an ice cream maker, pour the mixture into a 9" x 13" pan and set in the freezer. Using a fork, stir the ice crystals at least once every hour for the next three hours, making sure to scrape the crystals from the side of the pan (where they will form first) and re-introduce them to the rest of the mixture. Freeze overnight. The next day, before serving, scoop out the desired quantity for serving and blend in food processor until soft*. Serve, & enjoy the cooling goodness!


(*This is one of those times when I can really see the use for a kitchen gadget, i.e., an ice cream maker. After all, ice cream or sorbet made in a machine intended for that purpose is smooth, evenly textured and lovely, because the machine continually churns air into the mixture as it's freezing. Technically, what you're making by using the pan-and-stirring-with-fork method is a granita, equally lovely tasting, but a lot coarser in texture, more like a snow cone. Putting it in the food processor the next days helps to incorporate some air and makes the texture finer, but you may need to stick it back in the freezer for a few minutes afterwards to firm it back up a little. Takes a little extra work this way, but it does taste delicious.)


I had some textural issues with this sorbet, mostly due to the fact that we don't have a proper ice cream maker. The mixture froze absolutely solid in its container, and was a real pain to chip out for serving. I'd like to experiment with some additives to keep it from freezing solid and hopefully maintain a smoother, softer texture. Gelatin, maybe, or a splash of vodka or sparkling wine? I'll keep you posted. But, not wanting to waste our precious frozen personal watermelon mixture, we ate it once as sorbet and from then on just threw chunks of it into the blender with limeade to make......FROZEN WATERMELON LIMEADE. Which, I'm telling you, is an instant summer classic.


Serve in a tall glass with bendy straw. :)

Saturday, March 12, 2011

Banoffee Pie: Keep Calm & Carry a Fork!


BANOFFEE PIE.

Oh, I know. I disappear for months without a trace or even a hint of a a recipe, not one little blog post, and now I return here to you with..........banoffee pie? But just bear with me! It's going to be good.

Those of you reading this from North America may have never experienced the charms of banoffee pie; you may never even have heard of it. Let me briefly enlighten you. Banoffee (one of those delightful food-name portmanteaus, constructed from 'banana' and 'toffee') pie is a quintessentially English dessert, like trifle or sticky toffee pudding. It is a sticky, sweet, rich slice of creamy heaven. And it's even better when you top it with caramelized nuts.

It's also traditionally made by boiling an unopened can (yikes!) of condensed milk until the contents transform into a sticky brown caramel sauce known elsewhere in the world as dulce de leche. Right away, I knew that I would be deviating from tradition for three excellent reasons:

- One, that boiling a sealed can of anything for hours and hours until it either reduces and become delicious or, alternatively, explodes violently in your face in an eruption of molten liquid and shrapnel, killing you very much dead.......scares the living daylights out of me.

- Two, that I've actually heard that the dulce de leche base is a touch too thin for proper pie filling, resulting in fruit slices that sink to the bottom. And while that still sounds delicious, it's somewhat lacking in presentation appeal.

- And three, I had just discovered a recipe at one of my favorite cooking blogs, The Smitten Kitchen (I owe her so much!), for caramel pudding. Which is most likely what put the idea of banoffee pie into my head in the first place. Soft, yielding, puddingy, but stiff enough to stand up to a mound of banana slices and whipped cream--it sounded like the ideal middle layer for the pie of my dreams.


The crust is a simple crushed graham cracker crust, my favorite choice for creamy desserts like pudding-filled pie or cheesecake (versus say, a fruit pie, for which a pastry base is the only logical choice). Crumbly and delicious. The pudding, I have to say, is delicious. I added a touch more salt than Deb's original recipe calls for because I am a sucker for that 'salted caramel' flavor. I also have to say, because I feel somehow obliged to disclose it.......that this pudding is too thick and gelatinous for me, as pudding. I say this having made it twice now, it takes most of its texture from the six (six!) tablespoons of cornstarch that get stirred into the mixture. The end result is quite stiff, almost bouncy, and I just can't imagine sinking a spoon into it and eating a cup of it on its own as pudding. As banoffee pie filling, however, its very stiffness is its best feature, making for a gorgeous and easily sliced pie that holds its shape perfectly.


My husband, who has never understood the proud & historic cuisine of the British people, unreasonably insisted that we try putting sliced strawberries on the pie instead of the traditional bananas. I gasped and clutched my pearls. I told him that such a thing would be a crime against decency and Mother England, if not an abomination before humanity itself! But because I love my husband senselessly, even more than I love banoffee pie, I agreed to the compromise you see above.

And okay. Actually, it was delicious. Listen to your heathen husbands once in awhile. Only......what should we call it? Strawbanoffee pie? Banoffeeberry pie?

Top with fresh whipped cream, and a handful of nuts if desired. I recommend that you toss them lightly in a pan with some butter and sugar to glaze them, then let them cool before sprinkling them on top.

BANOFFEE PIE.


You know you want it. :)

Orange & Salt's Banoffee Pie

Graham Cracker Crust:
1.5 cups crushed graham crackers (I ended up using about half a box)
1/4 cup sugar
1/2 tsp. salt
6 T. melted butter

Preheat oven to 350. Mix dry ingredients together in bowl, add butter and stir or blend with your hands until the mixture resembles wet sand. Press well into bottom and sides of tart pan. Bake for 8-10 minutes.

Caramel Filling:

Here's a link to the excellent caramel pudding recipe over at Smitten Kitchen. Enjoy! (Don't forget to let your pudding base cool in the fridge after you've cooked it and spread it in the tart crust base, so as not to melt the whipped cream all over the place)

Pie Topping:

One perfectly ripe banana (and some ripe strawberries, if you're making Strawbanoffeeberry Pie, you weirdo you)
Half pint of whipping cream
Sugar (enough to lightly sweeten the cream, plus a little extra for the nuts....maybe a few tablespoons in all?)
Chopped walnuts (pecans would also be awesome here)
Small amount of butter

Slice fruit thinly, and place in an even layer over pie base (crust & pudding mixture, cooled). Whip cream and sugar (to taste) with electric mixer or whisk until it holds soft peaks. Spread over pie base, chill in refrigerator until ready to eat.

Heat a small amount of butter (very small, like half a tablespoon) in a skillet over medium high heat. Add chopped nuts and sugar, toss to coat. Cook until nuts are glazed with browned sugar, immediately remove from heat. Let cool, then sprinkle on pie.

Slice.

Enjoy.

Do it for England. :)

Sunday, October 3, 2010

Project Food Blog Entry #3: 'Well I've never been to Spain.....But I kinda like the food there!'

So, 'luxury.'

It is a funny thing, isn’t it?

After all, one man’s seared foie gras is likely another man’s ballpark-dog-with-everything. When asked by Project Food Blog’s Challenge #3 to approach a luxury meal for a dinner party, I decided after some thought that what matters most is the way it makes everyone in the room feel, the elevation from everyday meal status to something higher. Using ingredients you wouldn’t normally use, spending amounts of time you wouldn’t normally spend, all these things contribute to the creation of a truly special meal.


Coco Chanel once declared, famously, that ‘luxury must be comfortable, or else it is not luxury.’ Ol' CC might not have been facing down the prospect of hosting a dinner party, but it's a wise approach. She was talking about ladies’ fashion, of course, and urging women of the early-to-mid 20th century to shed the outdated notions of modern corsets and other binding fashions and step into stylish clothes that truly fit their bodies and their lifestyles. Still, it’s one of my favorite quotes about luxury in general.

After all, what’s a $1,000 dollar meal with white tablecloth service if you don’t enjoy it? What’s luxury if it doesn’t fit your lifestyle?


Around here, chez Orange & Salt, we are emphatically not white tablecloth service people. If you come for a meal in this household, be prepared to put your elbows up on the scarred wooden table, drink from our recycled-glass glassware, and maybe even share footspace with a dog or two. You will, however, be treated like absolute royalty in terms of what comes to you from my kitchen on your plate. Hours will have been spent behind the scenes in a happy, steamy kitchen, crafting each course. Good music emanating from somewhere in the background. People are laughing, eating. Everyone sighing, relaxed, pouring a little more wine and anticipating the next round of plates. You can leave your tie at home.

Sounds like serious luxury to me.

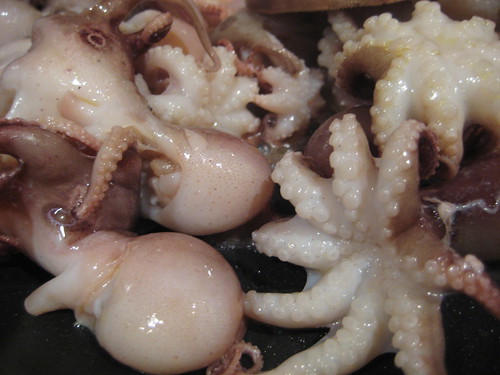
First piece of advice when planning a dinner party of any kind? Have a clear idea in mind of the kind of event you want, and plan your guest list accordingly—sounds a bit simple, but it’s true, and an often-overlooked part of planning. Some folks wouldn't dream of hosting a dinner event without a centerpiece and adorable decorations on the table; I wouldn't dream of having anyone over without some really excellent music playing in the background (another quick dinner party tip: think internet radio! There are a few services that are offered completely free, and will keep a constant soundtrack of the music of your choice playing in the background for hours--because no one should have to fumble around with CDs while she's also trying to sort out her Romesco sauce!) If it should turn out you are a white tablecloth kind of person after all, that’s wonderful. Make sure to invite a group of people who love white tablecloth dining. For my event, I invited a handful of some of my best food friends, the ones I like to think of as my Adventurous Eaters Club. These guys make complicated soups, desserts, and homemade bacon at the drop of a hat, and we're all used to sitting down to dinner together. I knew I could feed them anything, even baby octopus, and no one would so much as blink an eye.


(Click menu to enlarge)


Second piece of advice when planning a dinner party of any kind? Plan the menu, silly. Oh, I know this seems as though it should be obvious, but I really mean it. Do you want to highlight seasonal dishes? Regional cuisine? And how much work do you actually want to do? The commonly held wisdom I was always given on dinner parties is that everything should be more or less ready to go when guests arrive so that you, the gracious hostess, may spend the maximum amount of time sitting down with your guests and presumably charming them all (if you figure out how to actually do this, by the way, please share the secret with me). I knew I wanted to do some serious cooking, and because our kitchen and dining room flow openly right into one another, I felt comfortable 'breaking' this classic rule to spend more time in the kitchen. I'm personally more comfortable holding court from the kitchen than from the table, anyway, chatting with a wooden spoon in one hand and a glass of wine in the other, a dishtowel wrapped around my waist, calling out to the dining room and occasionally delivering steaming hot plates of treats to the gathered guests. Your mileage on this, it goes without saying, will vary. But know yourself.


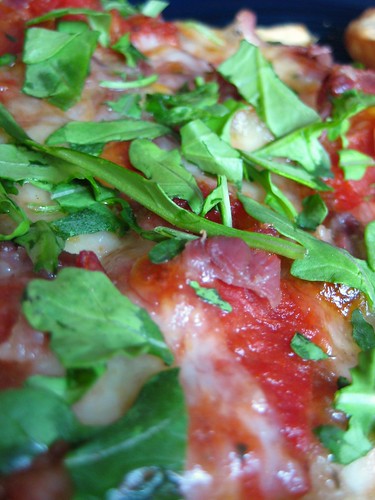
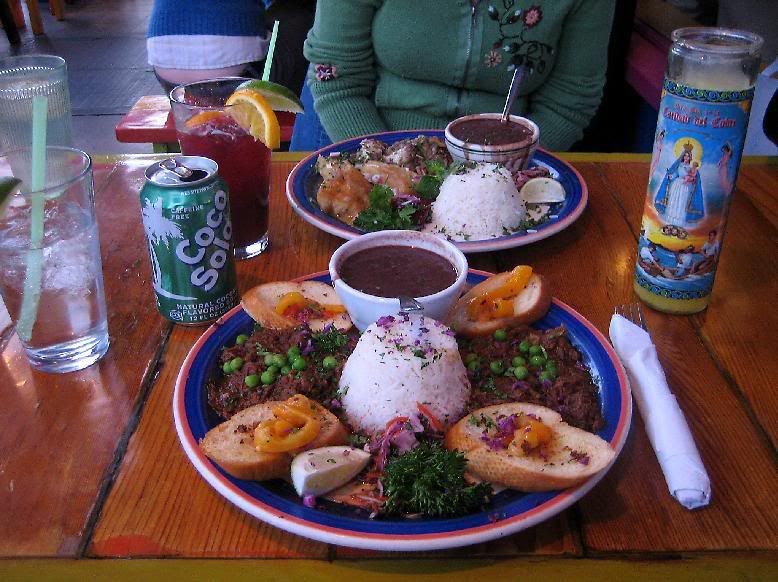
For this challenge, I opted to go with a Spanish-influenced menu. I’ve never been to Spain, as the classic song goes, but I’ve always loved the dishes, the ingredients, the photos, the food stories and everything else I’ve ever seen relating to their culture. One of my favorite ideas to borrow from Spanish culture is tapas: the serving and sharing of a variety of ‘tiny bites’ courses on many plates, usually with wine. A tapas course seemed the perfect way to kick off my Spanish meal, and I knew I’d have to have one at this casual but luxurious meal, centered around close friends sitting down together and sharing.


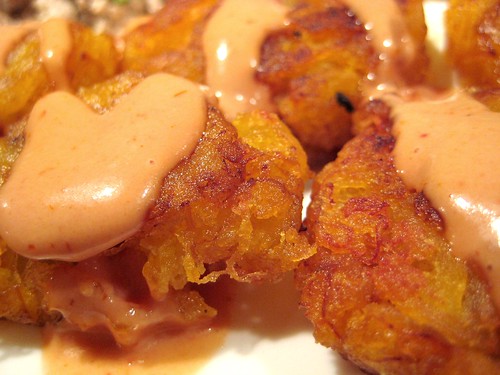
It was a great reason to buy up a pile of tiny whole anchovies and lightly dredge in flour and quick-fry them, as I've seen done before but never tried. It's a classic Mediterranean snack, and I'm happy to report that they are delicious. Crispy, paprika-seasoned chickpeas, also a major tapas revelation--they're tiny and easy to share, but they won't last long! Everyone loved these.

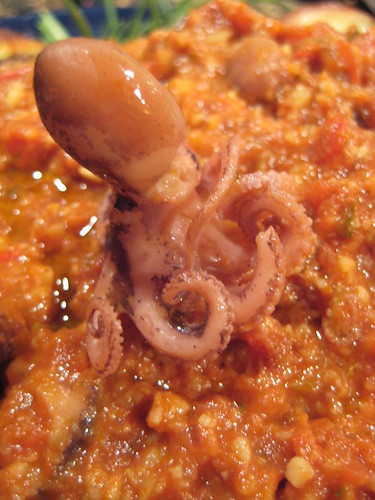
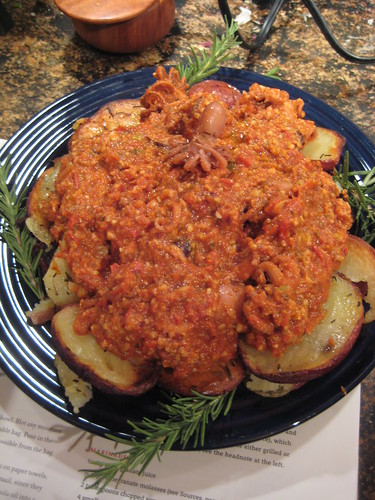
Following this was a course of baby octopus simmered in rich, almond-and-tomato-based Romesco sauce and served over a golden bed of crispy roasted potatoes, then a sweet, tangy salad of shaved fennel and carrot, and a dish of braised chicken thighs (heavily adapted from of of the Great Thomas Keller's recipes from the Ad Hoc at Home cookbook) smothered in onions, fennel and olives. The octopus was amazingly tender (recipes for all these courses will be posted separately here on Orange & Salt), a treat for anyone who's ever suffered through a plate of rubbery tentacles, and the sauce was wonderfully nutty and rich. The raw fennel followed by braised fennel thing is a little trick I like to pull every now and again--it's really nice to have two versions of something so close together to contrast the flavors & textures between the raw and the cooked.


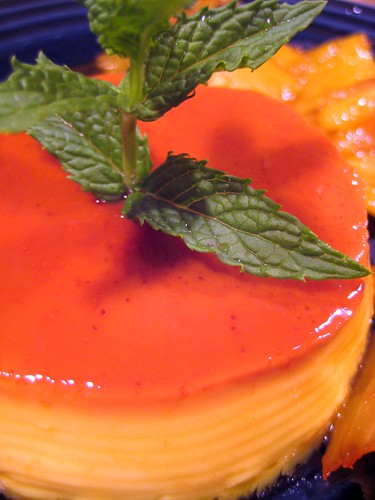
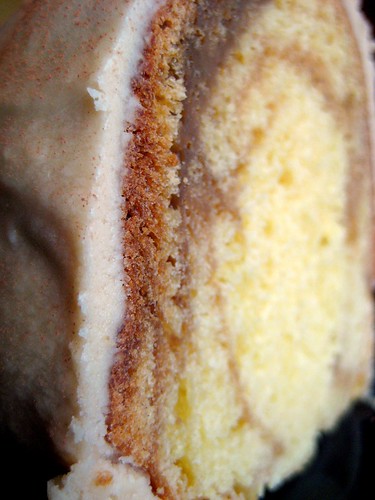
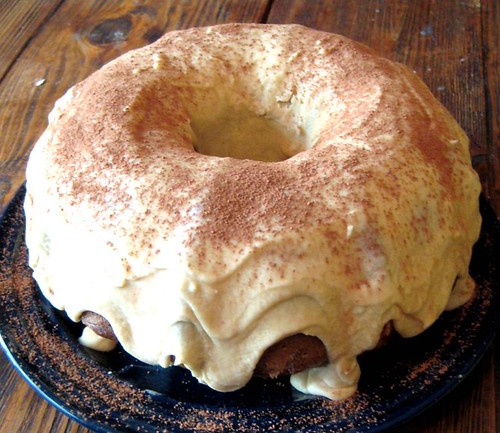
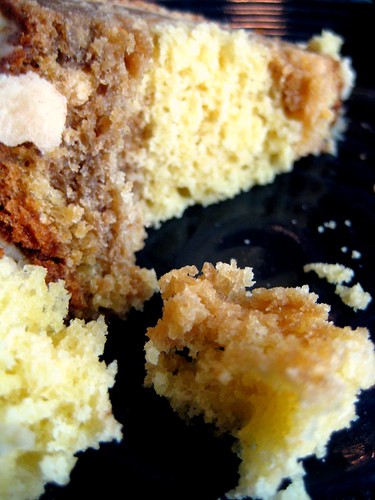
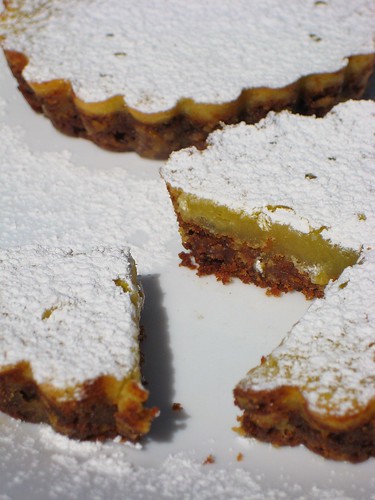
And then the dessert, oh my goodness......the dessert! Airy golden brown pillows of pastry, still warm and slightly chewy at the center and scented with cinnamon, soaked with honey, oozily melting together with a scoop of sweet vanilla ice cream and topped with ground pistachios. I think it goes without saying that I'll be making this one again sometime soon. Thank you, Spain, for the inspiration for this wonderful, wonderful meal. I thank you, and my guests thank you. Another borrowed Spanish idea to keep handy, by the way, is the late, late dinner......useful when things don't go quite as planned. When you forget some vital piece of prepwork and dinner is delayed an extra hour (not that this has ever happened to me, of course), you can just tell everyone you're eating at ten o'clock because it's the authentic Spanish way! Better living through cultural awareness.

Dinner parties are tricky, I’ll just throw that out there. In the case of this one, everything seemed to come together at the same time……..but not exactly in that hoped-for, ‘every dish is perfectly timed’ way. It went something more like this: my last-minute grocery shopping, needing to pick my husband up from the train station, still be home to greet early arrivals, and somehow finely dice the onion and the garlic and prep the chicken, well, they all seemed to need to happen simultaneously. What’s a hostess to do? What can you do, except get through it, put on a smile, get someone to pour you a nice glass of red wine, and keep stirring the octopus. Accept help when it's offered! Have someone set out the olive plate for you, designate someone to shred the carrots for you, and just keep going. And when it's all over, leave the dishes, kick off your shoes, and make sure to cozy up with a nice portion of the dessert plate.

Even Coco Chanel couldn't resist luxury like that.


Sunday, August 22, 2010

The Queen of Pop


Oh sweet, sweet, summer romance. Readers, I have been seduced........and it was by a frozen dessert.

When hot weather set in for the summer a few months ago (and in Phoenix, it clamps down over the city with a vengeance, not relenting until long after sweaters are on the department store shelves and the rest of the country seems to have swapped ice cold lemonade for steaming hot apple cider), this young girl's fancy naturally turned to popsicles*. It was fate. It was a natural collision of my well-documented love for food on sticks and anything that stands a chance at cooling me down from the boiling point in the middle of a 112-degree July afternoon. It's also something of a wave of nostalgia for the summers of my youth, when my mom always made sure we were well-supplied with homemade juice pops (made in these funky 1980s yellow plastic molds with juice-catchers at the bottom, and little sippy straws for draining every last drop! Remember those? Even back then, I thought they were the greatest invention). Freshly armed with my own brand-new set of popsicle molds, an updated version of our 1980s classics, I was ready to become the Queen of Pop.

( *oh, I know. A popsicle post in August? What's next, a roast turkey recipe in November? Well, just bear with me, sarcasmatrons, because it's worth it. I swear to you. And after all, who doesn't love a popsicle?)


Technically, here is where I should tell you that what I have been making and obsessing over all summer are in fact not 'popsicles,' that term having been trademarked in 1924 by Frank Epperson, the inventor of the Popsicle (which had previously gone by the much-less-snappy appellation 'Epsicles'). In their original form (invented, according to Popsicle legend, in 1905 when an eleven year old Epperson left a beverage and wooden stir stick on the back porch all night to freeze solid), Frank's frozen treats consisted of powdered soda mixture in various 'fruit' flavors and water, frozen to a stick. Sounds tasty, right? Um. Maybe not so much.


In fact what I've actually been making in my own kitchen is less like Epperson's iconic Popsicle and much closer in definition to the classic Mexican treat known as paletas, an ice pop based either on fresh fruit like strawberries, watermelon, guava, mango or tamarind, or creamy, milk-based flavors such as vanilla, chocolate, coconut, and even the rice pudding-like arroz con leche. The pops of my dreams are like this, thick with concentrated fruit and even green glimmers here and there of fresh herbs, or else creamy, smooth, and full of rich flavor. Almost like magic, flavors began to suggest themselves to me. Coconut and lime, with a hint of sweet basil! Tart strawberry and balsamic vinegar with honey and fresh mint! Creamy mango yogurt puree! Inspired, I think, by all the press surrounding the recent success of artisanal ice cream (particularly those in 'inventive' flavors) and wanting to bring a little of that glamour to the world of frozen pops, I began making plans to quit my day job (such as it was) and open a mobile popsicle stand. I kid you not, there was one night I even did have an actual ice pop-based dream. It's safe to say it had become an obsession at that point. A delicious, frozen obsession.


I experimented with many flavors, including the aforementioned coconut-lime-basil, strawberry-balsamic-mint, and mango-yogurt, but also blackberry-lime, creamy lemon curd, and (boldly, I thought) a slightly sweet coconut-milk based spicy peanut curry version. The last, according to my husband, is something of an aquired taste. To each his own. We found that the more watery an ingredient (say, certain kinds of fresh fruit), the harder and 'icier' the pop would freeze. Conversely, denser fruit with less water content like the sweet orange flesh of a ripe mango makes for a slightly softer, chewier pop. Yogurt is a great matrix for holding just about any fruit in frozen pop form, whether pureed or whole. And coconut milk--oh my! Coconut milk was the great discovery. It's tasty, of course, but something about the texture when frozen just makes it perfect. We're still experimenting over here at the Orange & Salt test kitchens. Summer, after all, is likely to be with us until Halloween this year. But in the meantime, I'm including recipes here for our top picks (and if you're feeling spicy, contact me for the sweet peanut curry pop recipe--I think it's an unappreciated winner and would love to share the recipe!), and I'm urging you to try them yourselves. Go on, be a pop star!


Recipe note: I have been using this particular set of popsicle molds, which results in 6 4 oz. pops. These recipes will yield enough for my set of molds, but your mileage may vary. I've been known to drink leftover popsicle mix straight from the bowl, so really, it's not a problem either way, now, is it?

Strawberry Balsamic Mint Pops

16 oz. fresh strawberries
3 tablespoons balsamic vinegar
2 tablespoons honey or sugar (this particular measurement is a very basic guide, your mileage may vary here depending on the ripeness of your strawberries and just how tart you like your sweets, so taste before freezing and feel free to adjust)
2 tablespoons fresh mint

Place strawberries, vinegar and honey into food processor or blender, puree until smooth. Strain through fine mesh strainer into bowl to remove strawberry seeds (this step optional but recommended for any very seedy fruit like berries). Place puree back in food processor with mint, blend until mint is finely disributed throughout, pour into molds. Freeze at least 6 hours.


Coconut Basil Lime Pops

1 can of coconut milk (14 oz.)
1 cup fresh lime juice
sugar to taste (again, this is intensely personal)
2 tablespoons fresh basil leaves

Blend all ingredients in a food processor or blender until desired consistency achieved. Pour into molds and freeze at least 6 hours.


Mango Yogurt Pops

1.5 cups plain yogurt
1.5 cups fresh mango pieces (if you're using a larger variety of mango like a Kent, this may be one whole fruit. However, if you're using something like the smaller, sweeter Ataulfo or Champagne mangoes I frequently see at my local markets, it may be more like two)
sugar to taste (you know the drill here)

Blend all ingredients in a food processor or blender until desired consistency achieved. Pour into molds and freeze at least 6 hours.

Wednesday, June 2, 2010

Pambiche-style Cuban pork tenderloin with black beans, fried plantains......and FLAN! Did I mention flan??


Once upon a time, back in ol' 2007, the husband and I journeyed to Portland, Oregon and fell in love. Not with each other, that is, we were already madly in love with each other......with the place and its people, its weather, its public transportation system, and its many, many wonderful restaurants. We had only to ask a stranger walking down the street or riding the bus next to us what was their favorite restaurant/artisanal bakery/microbrew pub and not only would we receive an immediate answer, but a handful of runners-up in case the one they had suggested was closed, too far a walk, or simply not our cup of tea (or house-roasted fair trade coffee). These people are opinionated and take their eating and drinking seriously. In the case of the man who first directed us to Pambiche, he didn't merely give us the address of the restaurant, he walked us from the streetcar we had all been riding together to the stop where we'd meet the bus we needed to take, gave us detailed directions as to where to transfer and where to get off, suggested what to try on the menu, and sent us on our merry way--with coupons!

He didn't work there. I think.

Cuban-style Pambiche (it's located at 28th & Glisan, Portland people) won us over immediately with its gloriously vibrant paint job, inside and out, its lively music & atmosphere, and......oh yeah, the food, have I mentioned the food? Amazing. See?? I had a plate of marinated roast pork with black beans and fried yucca slices that I still dream about to this very day.


In honor of our very first Pambiche dinner (which has since been repeated a few times, although sadly not as often as we'd like, since we live in Phoenix), Mike and I recently re-created a Cuban style feast at home. We marinated a pork tenderloin for hours in a bath of lime juice, olive oil, cumin and garlic, then sauteed it lightly and served it with fresh cilantro. There was a sofrito-based side of spicy black beans. And there were.......(happy sigh).....fried plantains.


Fried plantains with Mike's special 'pink sauce.'


Black beans stewed with sauteed onion, garlic and sweet bell peppers from my garden, seasoned with cumin, chili powder, and a splash of lime juice.


The best way to make fried plantains that we've found is Alton Brown's way (isn't that usually the way it goes? Recipe follows at the end of this entry). Alton prefers that you use green plantains, the ones that resemble a very unripe banana. They're quite a bit firmer than the ripe version, which makes absolute sense when you get to the step where he has you soak them in garlic-enhanced salt water, albeit briefly. Trust me, soft, ripe plantains cannot abide this particular step (ask me how I know, go on, ask me how I know!) and will crumble on you, so stick with the green ones. Once they're cooked they are tender, garlic scented perfection, golden and crispy on the outside but soft and yielding to the teeth on the inside.


And the best part is, you can use the leftover bits of pork and black beans to make Cuban tacos the next day! Win!

If you're somehow still hungry after dinner (and I promise I won't tell on you if you are), you can cap things off perfectly with a beautiful little flan, just like we did on our first night at Pambiche. They're made in tiny individual ramekins, so you won't feel like you're devouring a huge dessert portion all by yourself (unless, that is, you eat your partner's as well!). And there's fruit and greenery, see, pineapple, mint? If there's fruit it must be healthy! Cheers.


Flan with Caramelized Pineapple

1 1/3 cup sugar (divided into two 2/3 cup portions)
3 cups whole milk
1 teaspoon vanilla
4 large eggs

1 cup fresh pineapple, sliced into small chunks
1 tablespoon butter
1 tablespoon brown sugar
pinch of salt

fresh mint for garnish

Place 2/3 cup of sugar in a small saucepan and add just enough water to dissolve it, about 1 tablespoon. Heat on medium heat, swirling the syrup in the pan occasionally, but never stirring it. The syrup will boil for a while until it starts to turn brown. The trick to making caramel is to watch it carefully and to remove it from the heat while it's still a shade lighter than you'd like it to be (caramel keeps cooking in a hot pan, even as you're pouring it into the ramekins it's still cooking.......it can also burn in seconds, go on, ask me how I know this!). Once it has turned a very light nut brown, remove it from the heat and immediately pour the caramel into the bottoms of 6 ramekins. Set aside.

In another saucepan, heat the milk with the other 2/3 cup sugar until it reaches a boil. Stir in vanilla. In a mixing bowl, whisk the eggs for about a minute. Whisk in the hot milk, in very small amounts at first to avoid scrambling the eggs (this process is called tempering). Pour the milk mixture into the ramekins on top of the caramel. Place all 6 ramekins in a large oven proof dish. Fill the dish with water to about 2/3 the height of the ramekins.

Carefully place in 300° F oven. Bake for 40 minutes to an hour (bake until custard has set, test with your finger or by gently inserting a knife); make sure the water surrounding the ramekins does not boil during baking. Allow the custard to cool completely, then refrigerate.

To make the caramelized pineapple (you can do this while the flan is cooling), heat butter in a pan over medium high heat. Add pineapple, allow the pieces of fruit to cook until they are just beginning to brown on either side, stirring occasionally. Add brown sugar and pinch of salt (taste for correct amount) and stir for 30 seconds more, then remove from heat and let cool slightly.

To serve, run a knife just along the inside of each ramekin, then turn flan over onto a dessert plate. Surround with caramelized pineapple bits, garnish with fresh mint (this last step is, of course, completely optional. I happen to have an enormous, bushy mint plant that is slowly taking over the backyard--we call it MINTASAURUS--and so we use mint whenever the opportunity presents itself! Plus it makes it look all the more festively Cuban). Enjoy!


Fried Plantains, Alton Brown-style (original recipe from 'Good Eats' shown here)

Ingredients

2 cups water
3 cloves garlic, smashed
2 teaspoons kosher salt, plus extra for seasoning
1 1/2 cups vegetable or canola oil
2 green plantains

Directions

Combine water, garlic and salt in medium size glass bowl and set aside.

In a large (12-inch) saute pan, heat oil to 325 degrees F. Peel plantains and slice crosswise into 1-inch pieces. Carefully add plantains to oil and fry until golden yellow in color, about 1 to 1 1/2 minutes per side (the oil should come halfway up the side of the plantain). With a spatula or slotted spoon, remove the plantains from the pan and place them on a cookie sheet lined with parchment paper, standing them on their ends. With the back of the spatula, press each piece of plantain down to half its original size. Then place the plantains in the water and let soak for 1 minute. Remove and pat dry with a tea towel to remove excess water.

Bring oil back up to 325 degrees F and return plantains to pan and cook until golden brown, approximately 2 to 4 minutes per side. Remove to a dish lined with paper towels, and sprinkle lightly with salt. Serve immediately, with pink sauce*.

(*Pink sauce is a creation of my husband's, some version of which I believe he may have originally gotten from Jacques Pepin. It's an easily made condiment and it tastes good on everything--french fries, avocado slices, sandwiches, fried plantains, everything! Take equal parts mayonnaise and ketchup and mix thoroughly with liberal amounts of hot sauce, to taste. The preferred hot sauce around the Orange & Salt kitchen is Arizona Gunslinger, but we understand if you don't, you know, live in Arizona and can't get your hands on some. Chipotle-style Tabasco is also wonderful.)

Tuesday, April 27, 2010

I like big Bundts and I cannot lie.........


I like to think I'm an unconventional kind of gal. After all, I work as a painter for a living. I cut my own hair over the bathroom sink. I used to wear safety pins as earrings (yeah, it was an ill-advised phase in high school; I thought they looked wicked rad), and I've been known to make jewelry out of paper and feathers as well. I am what I think you'd call a 'fearless eater,' and there is almost no recipe on Earth that I won't at least try (unless it comes from the kitchen of Paula Deen, that woman terrifies me). But I must be more conventional than I realized, because as it turns out, I love to make Bundt cakes. Like, love it. There's something so satisfyingly structural about them, so finished from the moment they pop out of the pan. They're almost architectural, like desserts handsculpted by Buckminster Fuller (Google him, non-architecture nerds). And nine times out of ten, they need no more dressing to their curvaceous rounds and grooves than a simple dusting of powdered sugar, or the lightest back-and-forth drizzle of glaze. Oh yes. I like big Bundts (and ridiculously obvious blog post titles) indeed! So call me conventional.

Being the conventional, good wife-type that I am, as well as the recent recipient of a brand-new shiny Bundt pan (hooray for wedding showers!), I graciously and magnanimously allowed Mike to choose the flavor of our next Bundt. After all, I've put the man through so many of my kitchen phases in which I've been borderline-obsessed with learning to make my own bread or pasta or hot sauce or dumplings and nothing else, or the few months in which all I wanted to eat was hazelnut brown butter cake. Not wanting to be a kitchen dictator, I handed over the reins, and after a few minutes on Tastespotting (it's dangerous to linger there any longer) the verdict was in: Tiramisu Bundt Cake.


And look how pretty it is! David Bowie, Yoda and Peter Falk certainly seem to think so, anyway (there's a tantalizing peek into our weird, colorful little kitchen world for you). All golden brown, shapely perfection. Let's admire it for a moment, shall we?


Yes, yes, it's very pretty. But do you remember what I said before, the thing about nine out of ten Bundts requiring no further gussying-up than the lightest touch of powdered sugar or glaze? Well forget that, because this is the exception and I am about to cover this mother in a generous amount of boozy sweet mascarpone cheese--it is 'tiramisu' cake, after all! Farewell, glorious curves! It's for the greater good.


A slice of the finished product, in luscious detail.


It really looks more like an overgrown donut at this point than either a classic Bundt or a tiramisu, but hey. When there's this much creamy cheese, strong coffee and sweet sweet liqueur involved, how much do looks really matter?

Here's the verdict on the recipe: it's good. I love this particular combination of flavors, and I especially love the trick of separating this into three batches of batter (an espresso, a Kahlua, and a plain vanilla batter) and then marbling them together in the pan. It's pretty, and more reminiscent of a layered tiramisu than a cake that combined them into one homogenized mass would be. What I didn't love was the texture; even though I was warned by the original blog entry that this cake was a dense one, more like pound cake than classic vanilla sponge, I still wasn't quite prepared. We loved the taste but were hard pressed to eat more than a tiny slice each (although I have to admit to eating a slice right out of my hand the next morning with my coffee). Maybe I just prefer my desserts a little lighter in texture? Then again, a lighter cake might not be able to stand up to such a rich, heavy icing. More delicious research is obviously necessary!


Tiramisu Bundt Cake (adapted from original post here at Baking Bites)

3 cups all purpose flour
2 tsp baking soda
1 tsp baking powder
2 tsp salt
3/4 cup butter, room temperature
1 1/2 cups sugar
3 large eggs
2 tsp vanilla extract
1 1/2 cups milk
1/4 cup espresso (if you are fancy......lacking a home espresso maker, I substituted the same amount of my usual, superstrong, morning French press brew)
1/4 cup Kahlua

Preheat oven to 325F. Grease and lightly flour your Bundt pan. In a mixing bowl, whisk together flour, baking soda, baking power and salt. In a large bowl, cream together butter and sugar until light. Beat in eggs one at a time, followed by vanilla extract. Add flour mixture and milk to the egg mixture, a little at a time and alternating between each, mixing just until everything is incorporated.

Remove 1 cup of the batter into a small bowl. Remove another cup of batter into a second small bowl. Add espresso to one of the small bowls and whisk until well-combined. Add Kahlua to the second small bowl and whisk until well combined. Pour half of the plain batter into the Bundt pan and spread into an even layer. Pour the Kahlua batter into an even layer on top of the plain batter. Pour espresso batter on top of Kahlua batter. The flavored batters will be slightly thinner, and may spread into one another, but this will create a pretty 'marble cake' effect. Resist the temptation to mix or stir them. Carefully pour all remaining plain vanilla batter into the Bundt pan.

Bake 55-60 minutes, or until a toothpick inserted into the center comes out clean.

Let cake cool in pan for 15-20 minutes, then turn cake out onto a wire rack to cool completely before frosting.

Kahlua Mascarpone Frosting

1/4 cup butter, room temperature
4-oz mascarpone cheese, room temperature
1/4 cup Kahlua
2 cups confectioners sugar

Combine all ingredients in a mixing bowl and beat at medium-high speed until very smooth and fluffy. Use a butter knife or offset spatula to apply the frosting to the cake in a thick, even layer. This frosting is pretty boozy, hopefully that's your cup of tea. It didn't stop me from eating a slice for breakfast the next morning, as I mentioned, but you might not want to take all your cues from me. I'm unconventional. ;)

Sunday, March 14, 2010

Celebrating 'Pi Day' Two Ways............


It's March 14th, also known as Pi Day (3/14), which means........I suggest we all get busy baking some pie! Sure, there are a world of options out there in pie-land, a thousand variations on fruit pies and other dessert pies to choose from, but before you become overwhelmed: consider the humble pizza pie. Perhaps not so humble, when topped with bits of prosciutto, a tomato-onion-butter sauce, and a tender blanket of fresh, green baby arugula.


This is the way we ate ours a few days ago, and I can think of no better way to honor Pi Day than by re-creating this wonderful pie. In about an hour and a half, this slice of heaven could be on your plate!


For the crust:


2 C. all-purpose flour
1 packet active dry yeast
1 C. warm water
1 tsp. salt
1 tsp. sugar
olive oil

For everything else:

1 can diced tomatoes (in tomato season, I'd use fresh ones, but in March you're much better off using canned tomatoes than the mushy, pale pink blobs they sell in the produce aisle)
2 tablespoons butter
1/2 red onion, chopped
3 cloves garlic, minced
salt/pepper/sugar to taste
small pinch of dried oregano
a few slices of prosciutto
1 ball mozzarella
baby arugula

To make the crust, combine warm water and active yeast in a small bowl, and set aside for 5 minutes. Combine flour, salt and sugar in another bowl, add yeast mixture, and combine until dough forms. Knead vigorously for 1 minute on a well-floured surface, then place in an oiled bowl to rise for 1 hour.

While dough is rising, heat butter in a saucepan over medium heat, add onions and saute until translucent. Add garlic and saute for about a minute longer, then add tomatoes and cook for about 25 minutes, stirring occasionally, until tomatoes just begin to relax into 'sauce.' Taste & adjust seasoning with salt/pepper/sugar as needed, then set aside to cool.

When dough is ready, preheat oven to 450 and prepare a baking pan by liberally covering it in olive oil. Stretch dough to desired size/thickness in pan, sprinkle lightly with salt, pepper, and dried oregano, pat into crust. Spread sauce thinly over crust, then cover with slices of mozzarella. Finally, add small pieces of prosciutto. Place in hot oven and cook until cheese is bubbling and browned in places (about 20 minutes, but your milegae may vary, so keep a close eye on it). Remove from oven and allow to cool slightly, then cover with a generous handful of lightly chopped baby arugula. Slice & serve!

But what to serve after this perfect pizza pie, your sweet tooth cries? Smooth mozzarella, salty ham and the perfectly peppery bite of arugula leaves are all very well, thankyouverymuch......but what if your soul still cries out for dessert on Pi Day?? Okay. Maybe, if you happen to have a neglected lemon kicking about in the kitchen, a handful of other basic ingredients, and some adorable little tart pans, maybe you can make Lemon Tarts for Two.


Lemon Tarts for Two

2 tablespoons cold butter, cut into small pieces
4 tablespoons all-purpose flour
2 tablespoons brown sugar
2 crumbled gingersnap cookies
pinch of salt
juice of 1 lemon
1 egg
2 tablespoons powdered sugar, plus extra for dusting


Preheat oven to 350. Place butter, brown sugar, cookies, salt and 2 of the 4 tablespoons of flour in food processor and pulse until everything is combined and crumbly. Press into two mini tart pans to form crust, and bake until lightly golden brown, about 15-20 minutes, then remove and lower heat to 300.


Beat egg and lemon juice together, then add sugar and combine until dissolved. Finally, beat in remaining 2 tablespoons of flour until the mixture is creamy and no lumps remain. Pour into tart pans and bake at 300 for about 20 minutes, or until lemon filling is just set. Remove from oven and let cool thoroughly, then dust lightly with extra powdered sugar. Share with the one you love. :)

Wednesday, January 27, 2010

Another unfortunate side effect of Hong Kong...........


.......is my continued craving for sweet, sweet Cantonese egg tarts. I've never had anything quite like these before our trip to Hong Kong, but it's clear we were made for each other. Do not adjust your monitors--that supernaturally dense, rich sticky yellowness, that melted-yellow-crayons-in-a-pie-crust appearance that shouldn't be appetizing but somehow is--that really is how they are supposed to look. I discovered these at our favorite bakery two blocks from the hotel we were staying in and, like I said, promptly fell in love. At $2 Hong Kong (about 25 cents) each, it wasn't hard to convince myself to get one for breakfast...or lunch....or dinner........or a midnight snack.............


Contrary to their super-yellow appearance, there is no artificial coloring in these whatsoever. That somewhat scary hue is due to the very same thing that gives them their rich, sticky egginess: a custard rich in egg yolks. You know how farmer's market eggs always have those carrot-orange yolks compared to the plain yellow of supermarket yolks? Well these, I have to admit, were made using ordinary supermarket eggs...I'd love to try them with those velvety orange yolks I've picked up at the farmer's market, just to see how vivid I can get these tarts! Will keep you posted.

Some egg tart recipes I've seen call for evaporated milk, and you're welcome to try them, but I don't tend to keep evaporated milk on hand in the kitchen, and I didn't feel like making a special trip to the grocery store. I do, however, usually have milk or cream and sugar, and I had great success with this recipe. I should also point out that the goal here is to cook the custard gently without browning the top (this preserves that beautiful yellow color.....for Portuguese/Macanese-style egg tarts with browned tops, try Rasa Malaysia's excellent version) and most importantly, without superheating the custard so that it puffs up and then--NOO!!--explodes. Since the custard bakes at a relatively low 300 degrees, this should be no problem. Just trying to scare you. Ha.

For the tart shells: I always use Martha Stewart's classic Pâte Brisée recipe. All hail Martha. Press a small amount into mini-tart pans to form 6 tart shells. Makes about 6 mini tart shells.

For the custard filling:

1.5 C whole milk (at room temperature)
2 whole eggs plus 3 egg yolks (at room temperature)
1/3 C sugar
1/4/ tsp vanilla
Preheat oven to 350 degrees. Lightly beat all egg ingredients and press through a mesh strainer to remove any solid bits. Add milk and beat quickly by hand or in electric mixer on medium-ish speed for about a minute. Add sugar and vanilla, beat for another minute and let sit for ten minutes. Pre-bake tart shells in tart pans for a few minutes until pastry begins to stiffen and just barely turn brown. Remove and lower heat to 300 degrees. Returning to custard mixture, skim off any foam resulting from the beating, and pour custard mixture into into tart shells. Bake at 300 degrees for about 15 minutes, or until custard mixture has set (you can test this by jiggling the tart pans slightly, the custard shouldn't move). Remove, let cool, enjoy for breakfast...or lunch......or dinner......or a midnight snack............